
How to Make Simple, Vintage Paper Punch Flowers
I love a quick and cheap craft project, don’t you? If you answered yes, then read on to learn how to make vintage paper punch flowers that are so darling, you’re going to find yourself using them everywhere. See a list of ideas below.
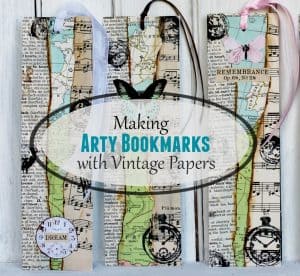
For other projects using vintage paper, check out my atlas paper stars, altered art bookmarks, and alter art tags. There’s no such thing as paper-craft overload, right?!!
")
Materials for Vintage Paper Punch Flowers
I just love the look of these cool flowers, and they are so easy. I got the idea from a pin by Sarah Ortega. On her blog she gives the simple steps to creating these sweet flowers.
 (Custom)")
This post contains affiliate links for products necessary to complete this project. This is both for your convenience as well as to support my blog, as I receive a small compensation whenever you click on such a link and make any sort of purchase, for which I thank you.
Materials
- Scalloped circle punch
- Brown kraft paper
- Vintage music, atlas, or dictionary paper
- 1/8″ hole punch
- 3/4″ Brass paper fasteners
- Distressing ink (optional)
How to Make Vintage Paper Punch Flowers

Step 1: Use your scalloped circle punch to make 8-10 punches per flower.
No paper punch? Scallops aren’t essential. Instead, you can:
- Use a circle punch,
- Use a compass to create a template and cut out your circles with scissors, or
- Use a small juice glass to create a template.
 Step 2: Collect your pieces together and punch a hole in the center using a 1/8″ hole punch.
Step 3: Insert a paper fastener to hold them all together. Open the fastener’s “arms” on the back of your flower, like the second photo. The front will look like the third photo.
")
Step 4: Starting with the top-most piece, begin pulling the flower “petals” toward the center, one at a time, making sure you wrinkle and crinkle a bit as you do.
Some of the papers I used were brittle (atlas paper) or thin (music paper), so I had to be aware of this as I pulled and wrinkled. You get the hang of it pretty quickly.
Keep doing this with all the pieces, except the very last one; leave that one flat. Once you’ve finished pulling and crinkling, rearrange the “petals” to create the desired look. Voila! A beautiful paper flower.
 (Custom)")
Step 5: (Optional) In order to age your flowers, you can “antique” them with Tim Holtz Distress Ink, like I did with the flower above on the right. To do this, you just lightly rub the edges of your flower on the ink pad until you get the desired look.
NOTE: To create a fuller flower, like the one on the left, use 10 circles, but use 8 to make the less full version on the right.
 (Custom)")
Step 6: (Optional) If you want to “finish” off the back, glue a circle punch (left) or a whole scalloped circle (right) to cover the arms of the paper fastener.
Uses for Vintage Paper Punch Flowers
- Use them as bows on gifts and gift bags.
- Use them as 3-D embellishments on craft projects.
- Attach a ribbon loop and hang them on your Christmas tree.
- Attach them to sturdy wire and create a “flower” arrangement.
Paper Punch Flower Examples
 (Custom)")
 (Custom)")
Here are the very first three flowers that I made. I used the atlas one on the right as a bow on a light blue gift bag, which I filled with my three burlap tree ornaments for my girlfriend for Christmas. It was purty, if I do say so myself.
You may also be interested in these crafty posts:


If you enjoyed your visit, I hope you’ll subscribe and never miss a post.
You’ll receive access to my MEMBER LIBRARY and get loads of FREEBIES!
SIGN UP BELOW and get the tutorial for today’s project:

Bye for now,

I’d love it if you’d pin for later–

These are so cute and what great directions! I just may have to try some of these soon!
You said you might want to try some crafts–maybe this one is it!
Very cute! I love the atlas flower. Glad that you enjoyed the tutorial 🙂
Thanks Sarah–that's a real compliment. Glad you stopped by 🙂
These are darling. Can't wait to see what you do with them.
Wonderful to have you celebrating the New Year at Seasonal Sundays.
– The Tablescaper
Thank you, Alma!
Love your flowers! If you have a minute, please come on over and share them at the Everyday Vintage link party at Helene's Legacy. Your style is a perfect fit!
http://heleneslegacy.blogspot.com/2014/01/everyday-vintage-link-party.html
Done! Thanks for stopping by and inviting me:)
ohhhh so pretty! I need a punch now, glad the yard sale season is coming, I hope to find a good deal. Love the map one the best! Thanks for sharing at our creative challenge!
Great tutorial and love the paper flowers. I have to pin. I actually have a board dedicated to crafting flowers. This will be a wonderful addition. Thanks so much for sharing.
How have I missed this one! Finally, a good use for those scraps of wrapping paper or Christmas scrapbooking paper that are too big to throw away and too small for anything but a tiny card of earrings!