
Vintage Music Paper Angel Ornaments: Low-Cost & Easy
I’m always on the lookout for new vintage-inspired DIY Christmas ornaments. Anything involving music paper and/or angels definitely grabs my attention.
Today’s project–vintage music paper angel ornaments–has floated around the internet for a couple of years, but I have found two ways to elevate it a notch by adding a button halo along with a vintage earring decoration at the neck.

Materials for Music Paper Angels
Note: This post contains affiliate links for [the same or similar] products used to complete this project. This is both for your convenience as well as to support my website, since I receive a small compensation whenever you click on a link and make any sort of purchase, for which I thank you. See my full disclosure here.

Materials:
- Music paper (similar to my vintage music paper)
- Wooden beads 3/4 inch/19mm
- Gold cord/thread
- Ivory buttons
- Hot glue
- Small decorations (I used decorative part of small clip-on earrings)
How to Make Music Paper Angels
1. Cut Music Paper
Cut the music into 5″ x 5″ squares. You’ll need two pieces to create this angel ornament.
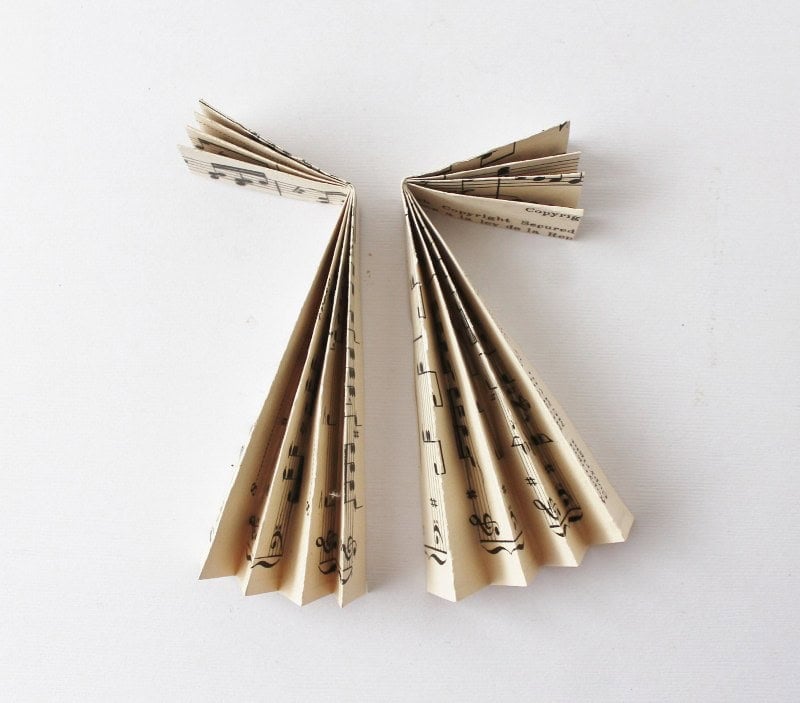
2. Fold Music Paper

Fold both 5″ x 5″ pieces in half three times. You’ll end up with each looking like the paper on the bottom.

Open the folded up pieces and refold them accordion style, like the paper you see here.
3. Create Arms

Measure 1.5″ on each piece and fold it at that point to create the angel’s arms.
Your two pieces should look like those above.
4. Glue Arms
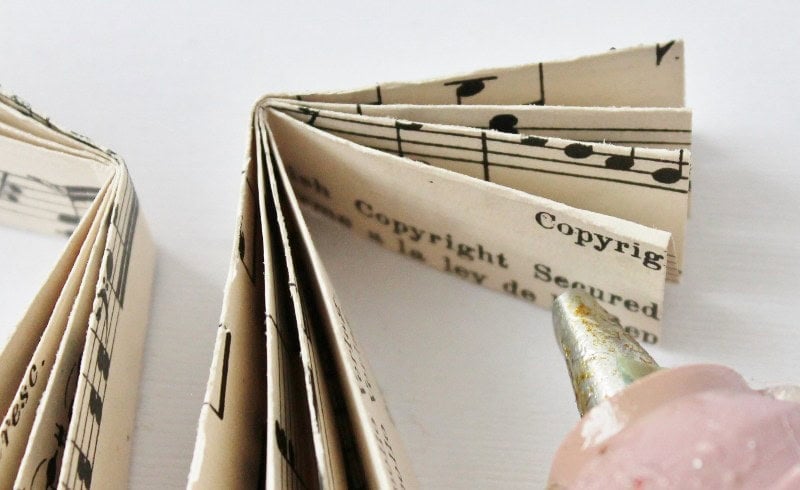
Apply hot glue onto the inside of the arm and press securely into place.
5. Attach Body Parts

Apply hot glue to one side of the inner body and press the two body parts together securely.

This is what your angel body with arms should look like after you’ve finished gluing.
6. Attach the Head

Apply a dab of hot glue to the top of the body and press a 3/4″ wooden bead into place to create the angel’s head.
7. Attach a Neck Decoration

Hot glue a decorative item onto the neck of the angel to add some additional charm. I use the decorative part of small clip-on earrings, like the turquoise and gold one you see here. Twist and/or cut the clip part off with a pair of pliers to create a flat back for gluing.
Other items that you could use to decorate the neck area:
- Buttons
- Plastic “gems”
- Resin flowers
- Bows made from ribbon
- Tiny bells
- Pom poms
- Vintage tie tacks
- Vintage lapel pins
8. Attach the Halo & Hanging Cord
A button (or other flat disc) will serve as your angel’s halo.

Thread a piece of fine gold cord through the button as shown in the first image. Then tie a knot and trim the cord close to the knot.
I like to add a dab of hot glue over the knot to ensure it doesn’t loosen.
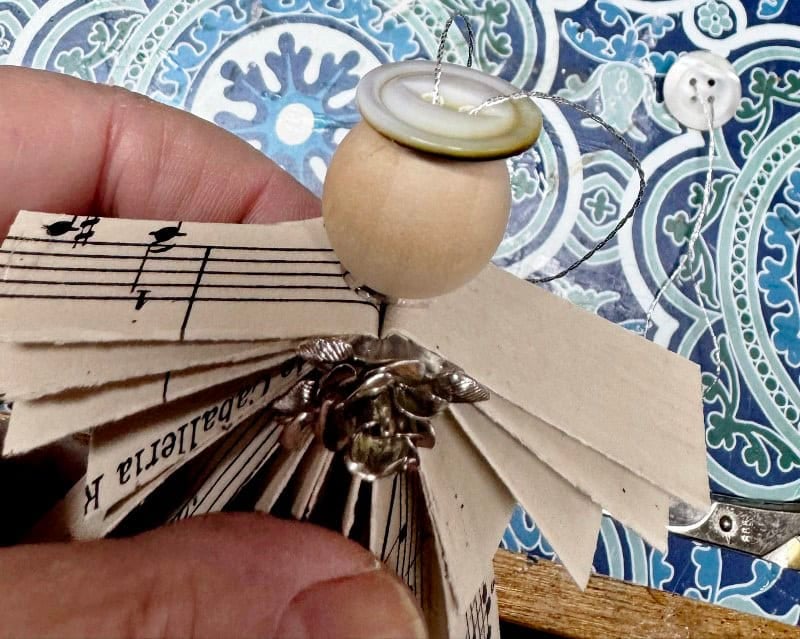
Apply a small ring of hot glue around the wooden bead “head” and press the button firmly in place. The knot and hot glue blob should fit nicely inside the bead opening.

Here’s a view of the top of the halo with the hanging cord above it.
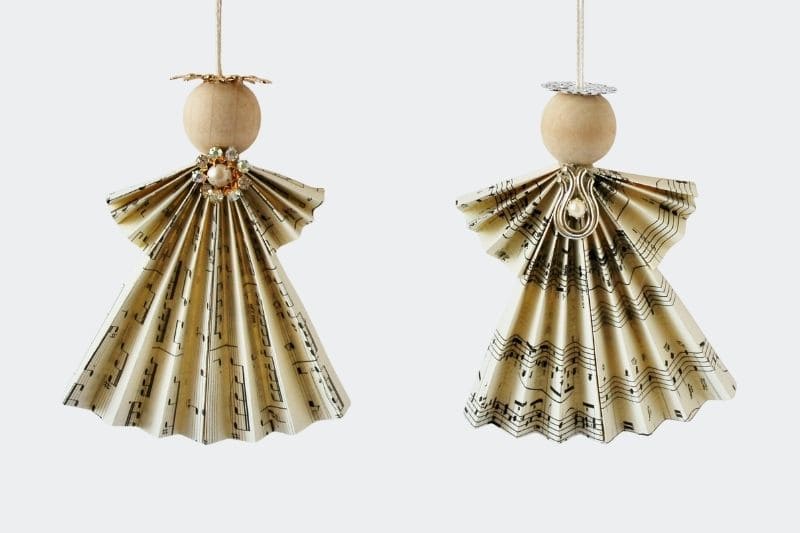
Music Paper Angel Examples

The finished product!


Other Christmas Projects You’ll Enjoy


Final Thoughts
If you’re a Christmas angel lover like me then this project is for you! They sell like hotcakes from my booth at the Shaker Holiday Market for $5 each. (I’m thinking about raising the price to $6 next year).
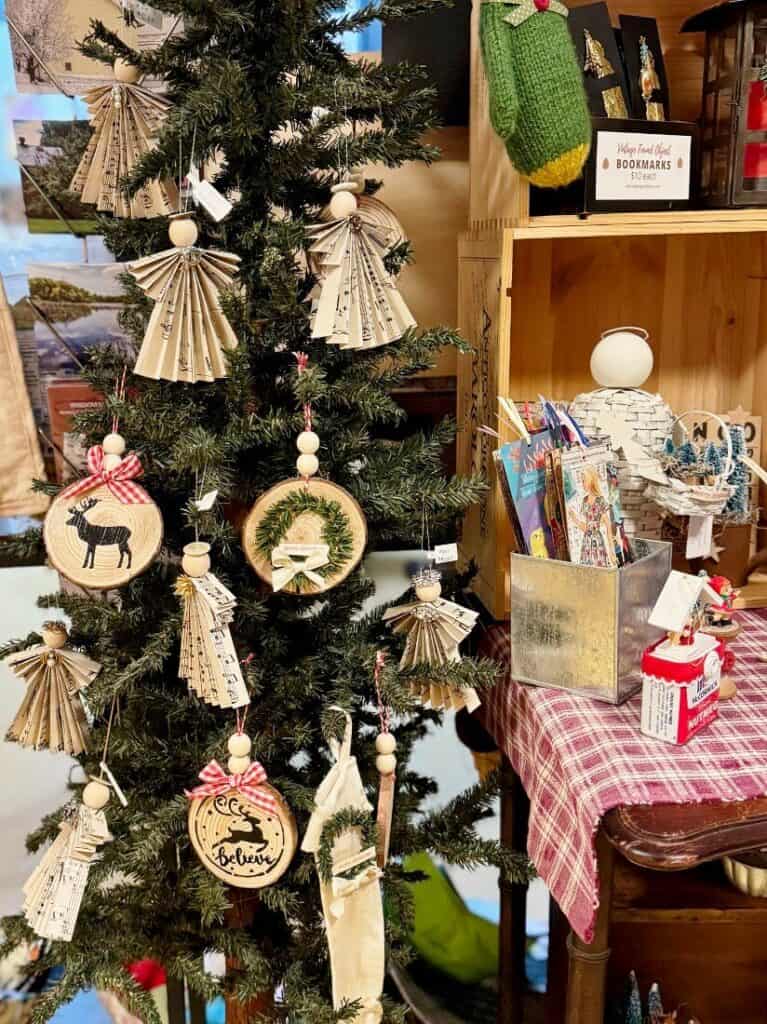
Above you can see them hanging on a Christmas tree at the Market, right beside a more full display of my vintage crafts for sale. See examples of many of the items I sell in this article: Vintage Christmas Crafts That Sell.
Thanks for stopping by–
If you enjoyed this post, subscribe today
and get a FREE copy of my eBook:

Bye for now,

Would you pin this image to your fave Pinterest board? Thx!

Lovin’ this angel so much! The best part is I think I have all the parts around here someplace or another. Wonderful up-cycling idea. Maybe I will use old songbook pages if they are stable enough. Thanks so much for the inspiration.
You’re welcome Cheryl!! Glad you like the project and it looks like you’ll be able to make some with stuff on hand 🙂
What a great idea! These would be pretty on any tree, but especially an old-fashioned o ne with orange slices, Shiney and Brite ornaments, etc. Love them. You bet I’m going to try these. Thanks so much for sharing, and Merry Christmas to you and yours!
Thank you for sharing this! The angels are so cute and look easy to make. I’m going to try to get some done this weekend to take to my booth on Monday!
Merry Christmas to you and your family. I hope you have a wonderful time this year!
Yay–so glad you like the project Jody! Hope that do well for you and that your holidays are blessed 🙂
Angels always seem to sell well at my church’s fair. Be a good way to use old hymnal pages of non-favorite hymns because I’d frame the faves! Scrap book paper and copies of Christmas music found on line would work well, too! Merry Christmas, Diana, to you and your family.