
Farmhouse Style Jute Webbing Ornament
Yesterday I promised to share how I’ve used my mini wreaths in various Christmas projects. Here’s an ornament with some farmhouse charm.
 Pieces of jute webbing have filled my workbench for several weeks as I’ve been working on “CHEERS” Christmas banners.
As I began making more and more wreaths, they naturally became jumbled together one day and I realized that they looked pretty good together.
An ornament was born.
It’s actually amazing sometimes that anything at all is “born” in my work room.
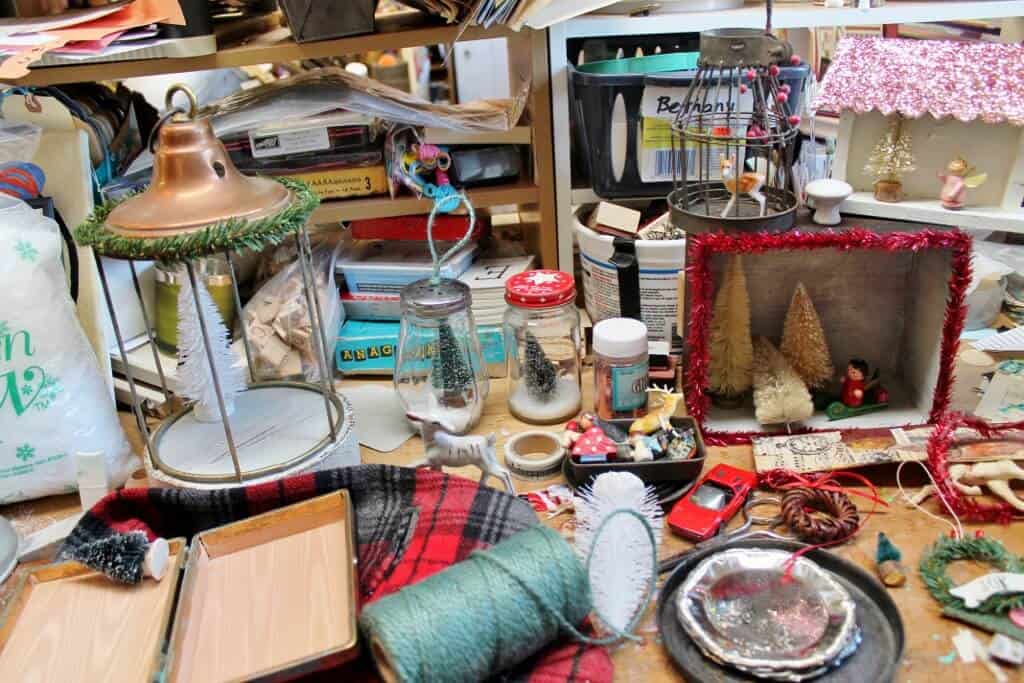
I should be embarrassed, but I’m not (LOL). I’ve finally accepted that this is just the way I create. When it’s time to work, I clear a space and get down to business. In between, spaces sometimes get a little–ahem–cluttered. But let’s get back to our project…
 First, you’ll want to make some of the mini wreaths I talked about in yesterday’s post: How to Make the Cutest Mini Wreaths You’ve Ever Seen. (I hope you’ll forgive the hyperbole!)

Then you want to get your hands on some yummy, 3.5″ jute webbing. Upholsterers use this for the seats and backs of chairs and sofas. I lucked out and purchased a whole roll at a garage sale at a good price.
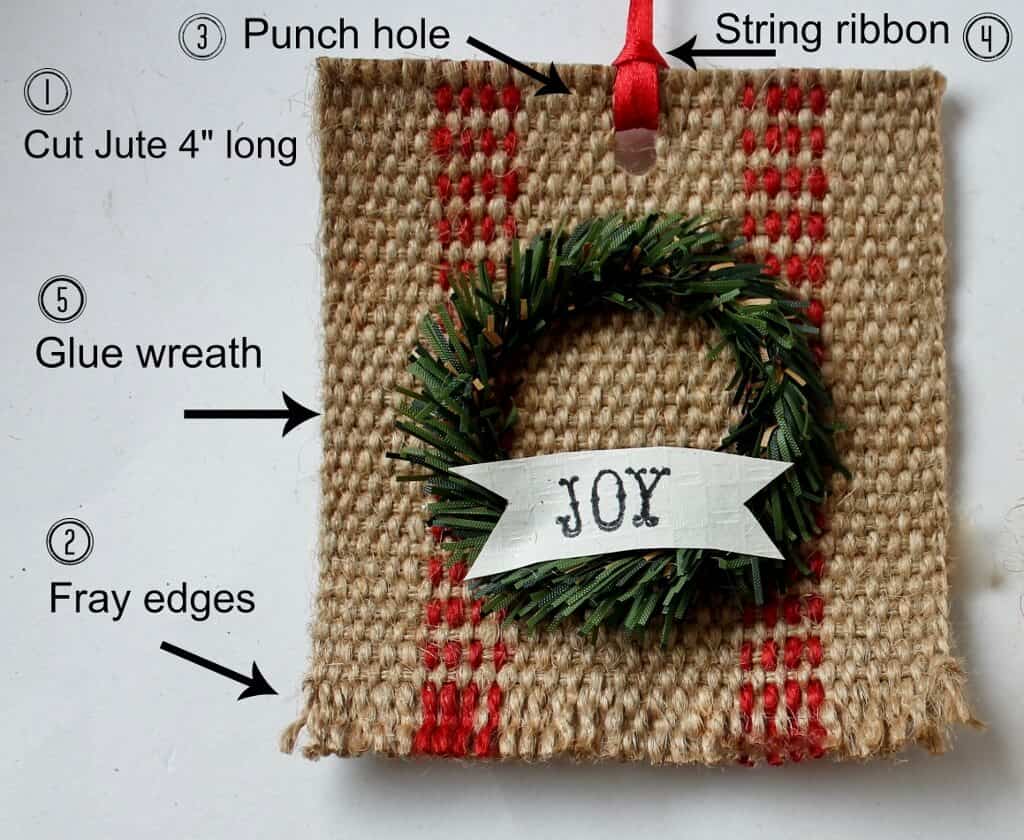 It’s a pretty easy little craft, but I think it has a great farmhouse appeal. Follow these steps and you’re good to go.
 An especially nice aspect of this project is that the jute does not fray easily. So, for example, the cut at the top, if made along the grain of the jute, will not fray because the weave is so tight.
Same with the frayed end; you won’t continually loose more strands of the jute. You decide how long you want it to be and then it stays in place.

Use them on packages, your tree, or around the neck of a nice bottle of wine.
How would you decorate with them?
More jute webbing projects you may be interested in:


Thanks for stopping by–
If you enjoyed this post, subscribe today
and get a FREE copy of my eBook:


Ohmygosh, so cute!
I have been making banners with jute for Christmas and love the look. I love these ornaments. They are simple, easy and quick. Love your blog so much!
These are absolutely fabulous!!! If I can get my hands on some upholstery jute, I’ll be making some.
Those are adorable Diana! That jute roll looks perfect for Christmas…what a lucky find for you! Love that it doesn’t fray too. Pinned.
Adorable and a great tutorial.
Thank you for sharing at the Snickerdoodle Create~Bake~Make link party!
Look how much fun your are having, love the shot of the work table, lol. Actually more organized than mine. Grins, Sandi
Oh, Diana, so cute! I actually have some of that webbing around somewhere … now if I can just put my hands on it, I can make some of these sweet ornaments!
Such a great idea!
I love this idea. What a great looking ornament. Pinned.
Those ARE the cutest little wreaths I’ve ever seen, Diana! I think even I could get it together to make some. Thanks for the idea!
Very sweet! I have that jute webbing and I think I found it at a yard sale too!
I love minis and these are just too cute, Diana–pinned!
These are adorable; love that webbing, but I prefer the black:) Totally envious of your photoshop skills…been working on it.
So cute Diana! I love that jute webbing and use it often. It’s perfect for Christmas! Thanks for sharing with SYC.
hugs,
Jann
This is beautiful! Hope you join us at Family Joy Blog Link Up Party this week http://thinking-outside-the-pot.com/?p=3142
Oh I so totally love those little wreaths! Thank you for sharing with us at the To Grandma’s House we go link party, hope to see you when the new one starts tomorrow 🙂
I am totally in love with these, Diana! I will definitely be making some and use them as gift tags. 🙂
Hi Diana, I had great fun making your little jute ornaments with my cousins, age eight and ten, yesterday afternoon. We added jingle bells to ours. I posted about them here, http://apositiveoutlook-janice.blogspot.com, and of course, added a link back to your wonderful blog.
I love the wreathes; have the pine; I may use ribbon with ends folded under until I find the jute! I LOVE your workspace; reminiscent of MY kitchen table when it’s in action! Have to shuffle to find room for 2 dinner plates! And New Year’s resolutions last for about 2 projects! Great bazaar idea!
I love this ornament. Started to make one but got stopped in my tracks when it came to punching a hole in the top. What kind of hole puncher did you use? None of the two I have are strong enough to punch through. I need some help here. Thank you for an answer.
Maybe your hole punches aren’t sharp enough? I’m not sure why they’re not working–I just used a regular old hole punch that I use for all my crafts. Maybe try a new one Rosalie?
I looped a jute cord with a bead on it and glued it to the back. It worked well and looks cute.
Great idea Sheryl!!