
Super Simple Christmas “Cheers” Bunting
Hi everyone! I hope you had a great weekend. On Friday I volunteered at the Shaker craft fair, helping to check people out and reorganize the booths. Saturday, sweet husband and I headed out to four nearby estate sales.
I’ll show you that loot next week since I have a lot going on in my world right now. Today I do have a fun Christmas bunting to share today, one that I crafted and sold last year, but never posted about.
I made two more this year and have already sold one via Instagram; the other is for sale at my Shaker craft fair booth. Want to learn how to make one?
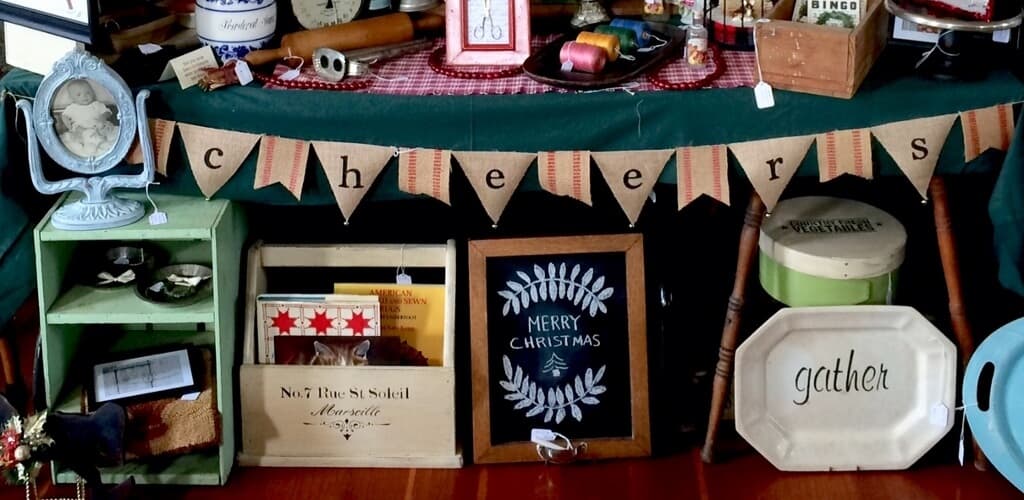 You may recognize several of this past year’s projects for sale in my [small, 6′ x 2′] booth. The light blue pedestal frame sold for $25.00, as did the gather platter for $18.00. Remember the magazine rack, chalkboard, and band box posts?
 Basically, you’re going to cut out six triangle or pennant-shapes from burlap and seven of the decorative jute inserts.
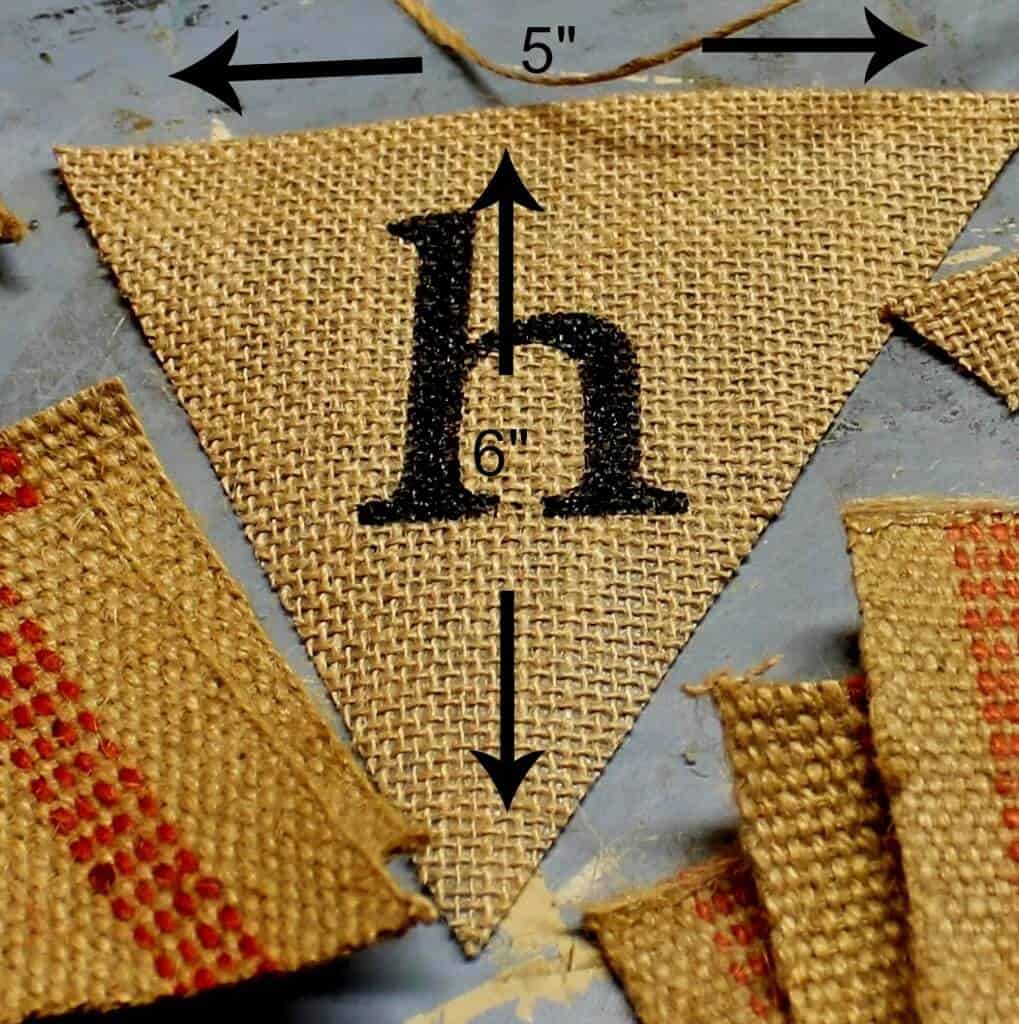 I happened to have some laminated burlap place mats I picked up at Goodwill for 99¢ each. I love working with them because they don’t unravel, but I’ve also made several buntings out of regular burlap. To prevent fraying, I apply a bit of Modge Podge to the edges with a paint brush. You can use my measurements to make a paper template or you can make one in the size of your choosing.
 I still have plenty of jute webbing left, even after making several farmhouse ornaments last week.
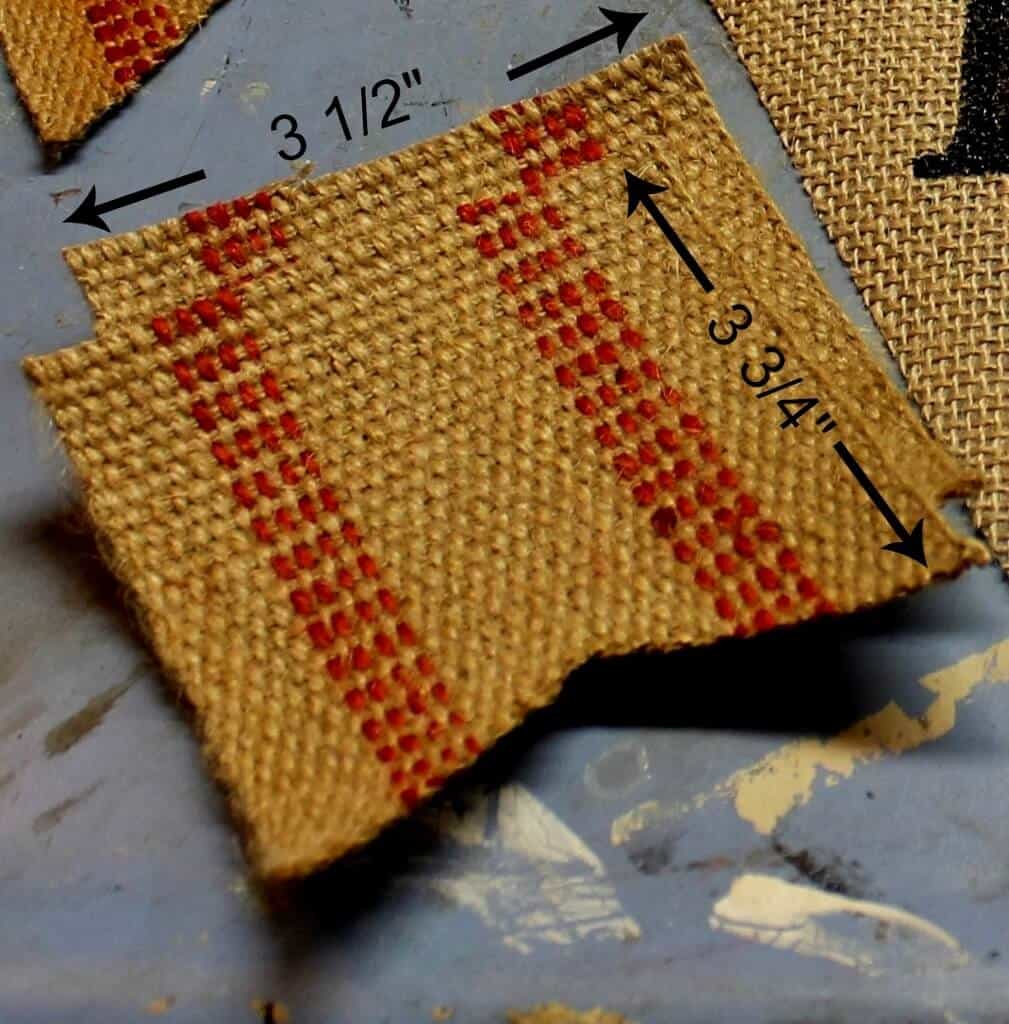 You can use my measurements, if you wish, or make yours larger or smaller.
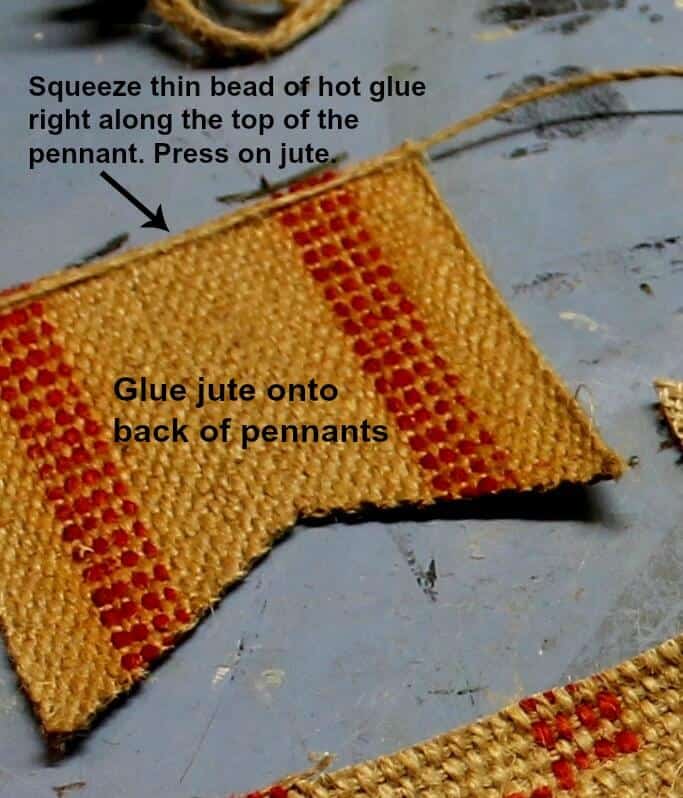 I attach jute to the back of my bunting pieces to allow for hanging. I turn all my pieces over so the back is facing up (make sure to spell your word backwards, so it reads properly when you turn it over(!). [LOL, twice now I’ve forgotten to lay it out backwards and got halfway into spelling “SREEHC.” Thankfully, hot glue is pretty forgiving.] To attach the pieces to the jute, lay down a thin bead of hot glue on one piece at a time, lay the jute over top, and then press down lightly to ensure good adherence.
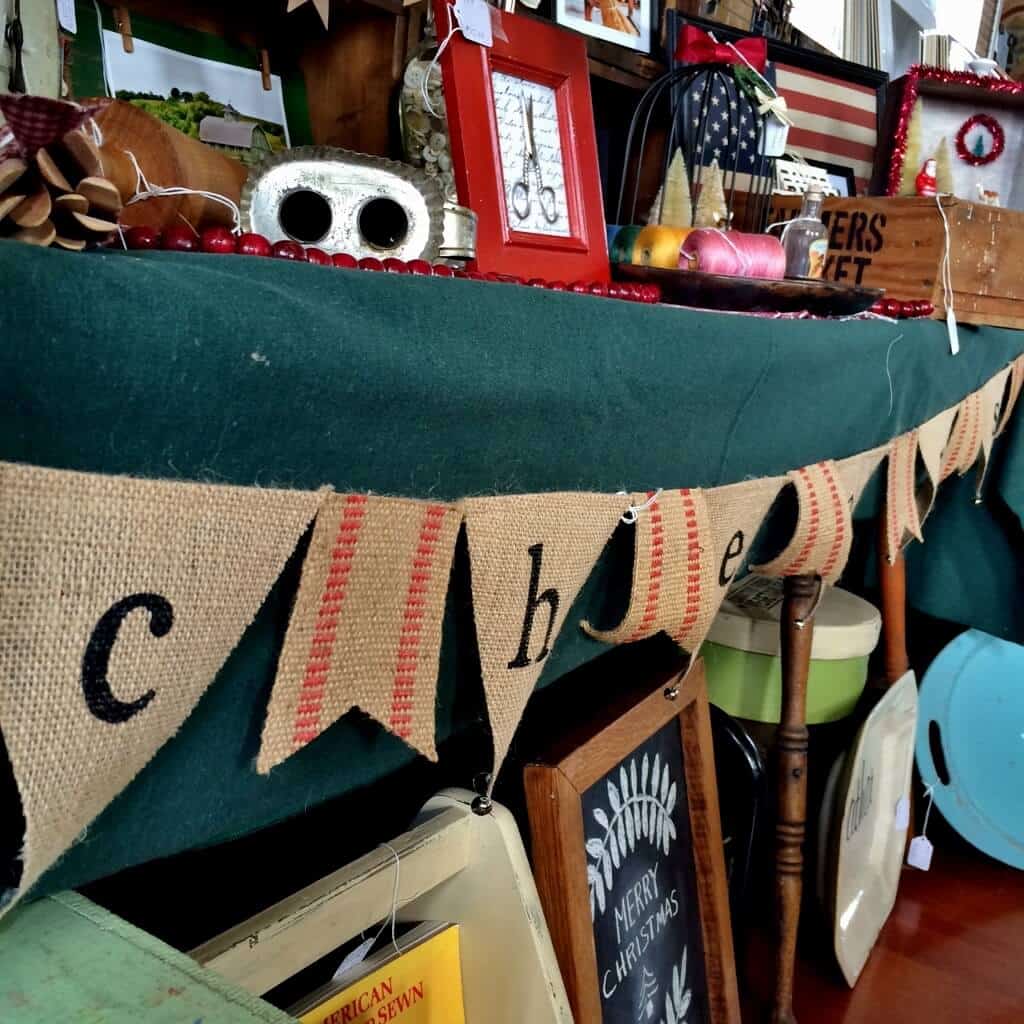
For the final step, sew or wire little jingle bells to the bottom of each letter pennant. It makes a lovely jingle and is a nice “extra.” As I mentioned, the bunting is for sale in my Shaker craft fair booth ($18.00), and I’ll be sure to let you know if it sells(!).
Thanks so much for stopping by today–
If you enjoyed your visit, I hope you follow me by email.
Sign up and never miss a post.
Let’s connect!
Facebook
Pinterest
Instagram
Instagram Shop
Twitter
Bye for now,

Diana this is absolutely adorable! I love the tip about using laminated burlap. Off to dig out my jute webbing. 🙂
This is so sweet. I hope I have a chance to make one for my fireplace. Pinned.
Really pretty Diana … thanks for the tutorial and tips. Happy holidays.
Very pretty bunting, Diana!
Love your bunting!
I love this! I’ve made a lot of things with upholstery webbing, but this is a new idea that I can’t wait to do! Thanks for sharing.