
Make Sassy Bookmarks with Vintage Sewing Patterns
I often come across vintage sewing patterns while out shopping in the wild for vintage. I’m absolutely in LOVE with the vintage fashions, hair styles, and attitude found on the front of these patterns.
They are so colorful and are begging to be used and appreciated in some sort of craft. Today you’ll see how I incorporated them into a fun project [that you might find rather addictive]: sassy vintage bookmarks.
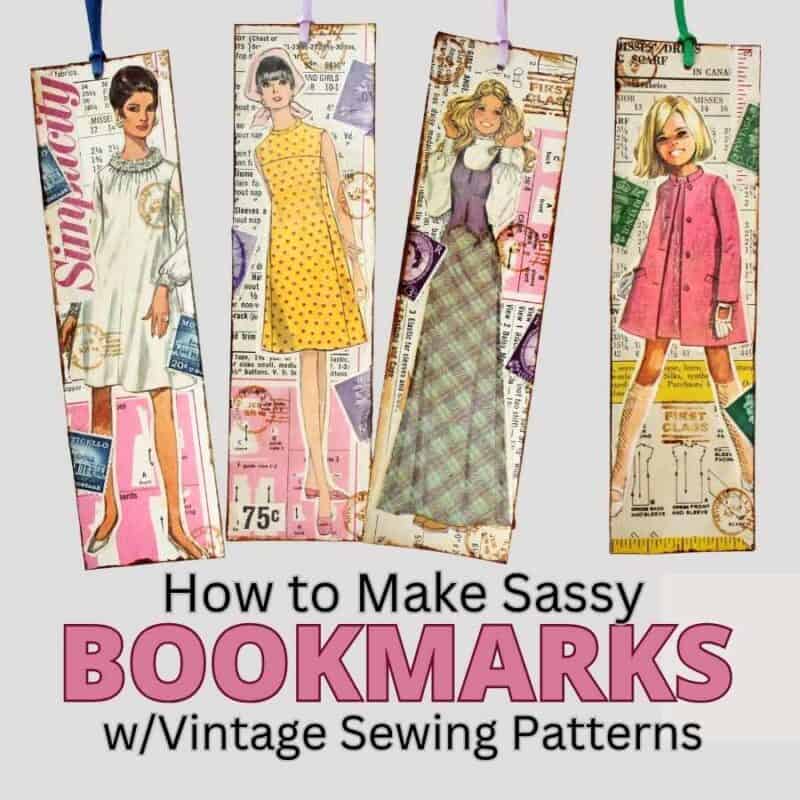
Table of Contents
How It All Started: The Inspiration
Materials to Make Bookmarks
Step 1: Make the Bookmark Base
Step 2: Select & Cut Out Images
Step 3: Glue Pieces to the Bookmark
Step 4: Other Embellishments
Step 5: Seal With Mod Podge
Step 6: Add Ribbon
Alternatives for the Bookmark Back
A Bookmark Variation
How I Display the Bookmarks
UPDATE 2023: Bookmark Examples!
UPDATE 2026: Even More Examples!
Reader Submissions
How It All Started

I recently picked up a bagful of vintage patterns at a garage sale for a dollar and immediately fell in love with the fabulous images on the front. I ironed the pattern “envelopes” to get rid of any creases and placed them on one of my work benches.
I knew I wanted to make something with these charming illustrations but needed to leave them sitting out where I could see them regularly. This meant I could let ideas percolate for a while in my brain, which then led to today’s project: bookmarks!
Materials to Make Sewing Pattern Bookmarks

This post contains affiliate links for products necessary to complete this project. This is both for your convenience as well as to support my blog, as I receive a small compensation whenever you click on such a link and make any sort of purchase, for which I thank you.
Materials:
- Vintage sewing patterns
- Vintage stamps
- Manila card stock
- Mod Podge
- Tim Holtz Distress Ink
- Postal cancellation stamp
- Foam brush
- Scissors
- 1/8″ hole punch
- Ribbon

I like embellishing many vintage or vintage-inspired projects with postal cancellation (or related) stamps, like the ones above.
Step 1: Make the Bookmark “Base”

Cut manila card stock into 2″ x 7″ pieces (or whatever size you want to make your bookmarks).

Step 2: Select & Cut Out Images From the Pattern
Cut out a section of a vintage sewing pattern that you want to feature on your bookmark. Make it slightly larger than your bookmark dimensions.
Also cut out other interesting bits from the pattern to use as embellishments, like the:
- Brand name (e.g., Simplicity)
- Descriptive words
- Ruler
- Pattern number
Step 3: Glue Pieces to Bookmark
Use Mod Podge to glue the large pattern piece to the card stock bookmark. Allow it to dry, then turn it over to the back and using sharp scissors, trim away the excess pattern.
Glue on some of the interesting little pattern pieces you cut out as well. Then glue on any other embellishments you have on hand, like vintage stamps. I usually add 1-3 pieces of coordinating stamps to each bookmark.
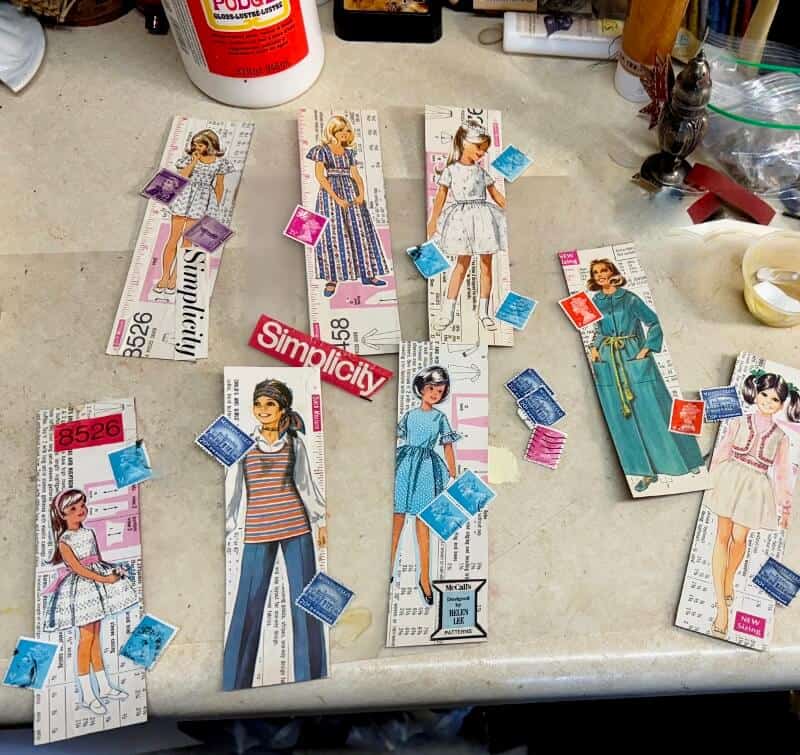
Above you can see the process I go through deciding where to place the pattern cut outs and the stamps.
In this close-up you can see that I added part of a vintage stamp to a bookmark, a piece of yellow “ruler” from the back of the pattern, and the word “McCalls” from the front.
Step 4: Other Embellishments
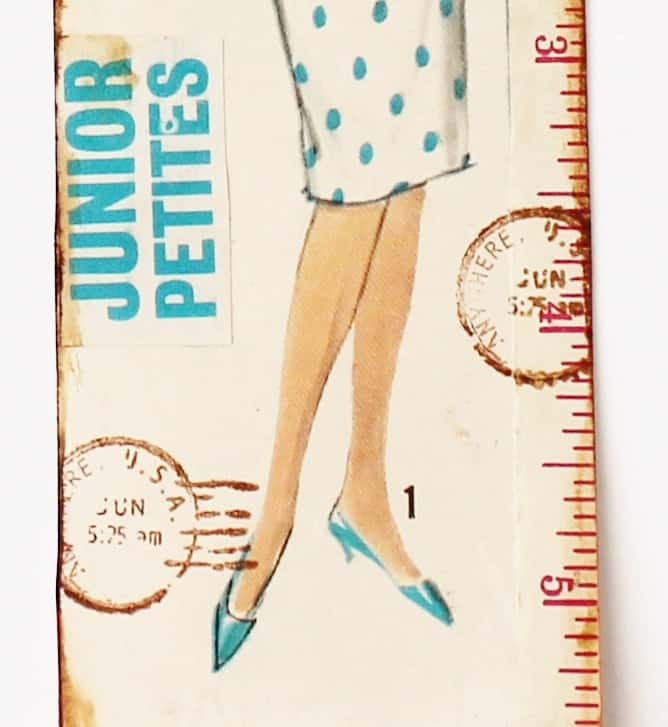
Stamp some postal cancellations (or other stamps) around the edges of the bookmark using the Tim Holtz distress ink (or other ink pad).
Edge the bookmark with Tim Holtz’s (or other brand) distress ink as shown above. I dip my finger into water to wet the edges and then run the ink pad along it.
I sometimes smear the ink and water together a little bit to get the look I want. (See the video below for a visual look at how to distress edges of projects.)
Step 5: Seal With Mod Podge
Use a foam brush to seal the entire front and back surface of the bookmark with a coat of Mod Podge. Don’t do it too carefully–you want to see brush strokes, which provide some texture to the project.
See alternative for backs of the bookmarks below.
How to Age Paper Projects w/Distress Ink Video:
Step 6: Add Ribbon

To finish off your bookmarks, punch a small hole at the top and thread some pretty ribbon through it. I like to use an 1/8″ hole punch because I think it looks a bit more professional, but use whatever you have on hand!
An Alternative for the Bookmark Back

As an alternative to applying Mod Podge to the back of your bookmark (as seen on the right above), you could spray them with what I call “aging spray” (left above). It’s just strong coffee in a spray bottle with a pinch of alum (for preservation, though not absolutely essential).
I have difficulty keeping the backs of the bookmarks free from splotches of distress ink and patches of Mod Podge because, yes, I am a MESSY crafter! The aging spray pretty much covers all the mess up.
A Bookmark Variation

Instead of cutting out a bookmark-sized piece from the front of the pattern, you can cut one out from the back. This will serve as a sort of “canvas” for your project.
Select an image from the front of the pattern that you like and either cut or tear around the image with your fingers, leaving a white border all the way around.
Glue the image to your bookmark and then follow Steps 2-6 above: add embellishments: words, postage stamps, and or ink stamps, age the border with distress ink, seal it with a coat of Mod Podge, and add a ribbon at the top if you like.

I think I almost like these best! Which do you prefer? Do you have any vintage patterns in your craft stash that you can use to try out this project?
Earlier in the post, I referenced similar bookmarks that I made a couple of years ago. I sold every single one of them at the Shaker Christmas craft show that year for $3.50 each.
This year I’m planning to sell these new sewing pattern bookmarks at the show, but I’ll raise the price to $4.
If you have an antique/vintage booth in a shop that allows some handcrafted items, you may want to try these. I think buyers are often looking for unique, lower-priced items that make them feel good.
UPDATE: in 2023 I raised the price for these bookmarks to $5 and I always sell out of them!
UPDATE 2023: More Bookmark Examples!
I had such a ball making these that I’ve continued to make them every year for the craft show. Here are some of them:

I love the view of the back of the black dress (on the left).

The mini dress is so fun!

Sometimes you can make two or three bookmarks out of just one pattern 🙂
UPDATE 2026: Even More Examples
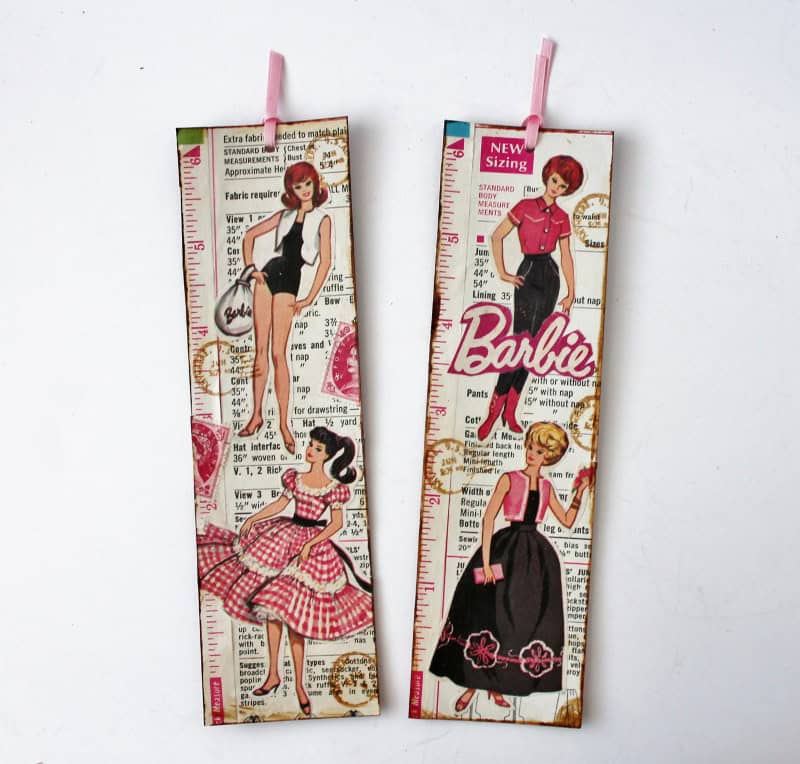
These two Barbie themed bookmarks are probably my all-time favorites! I’ve only ever found one Barbie pattern but I’m always on the look out for more.
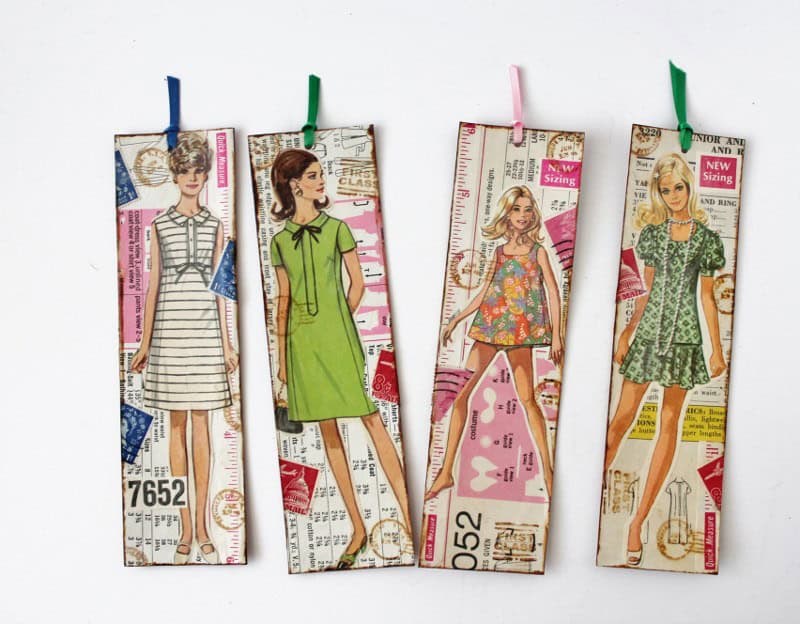
More cuties.
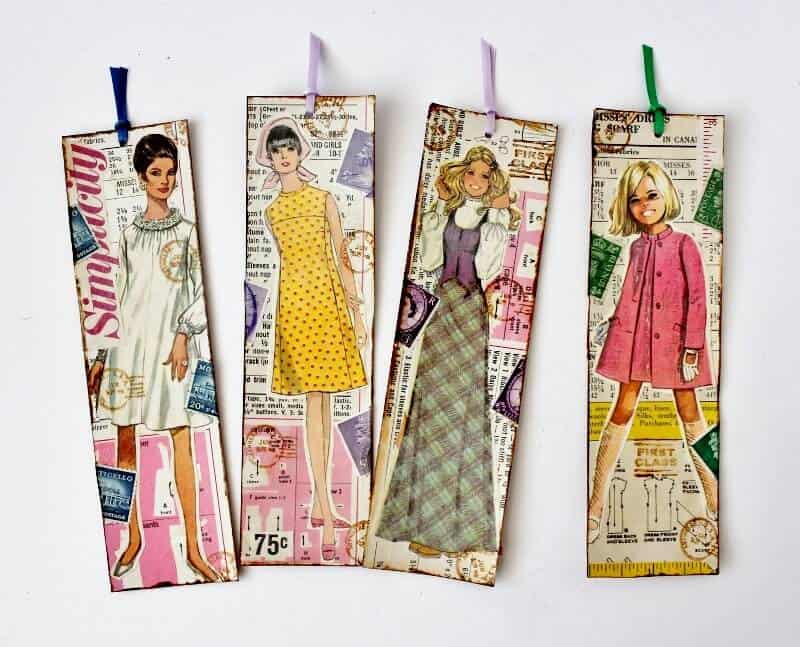
And even more.
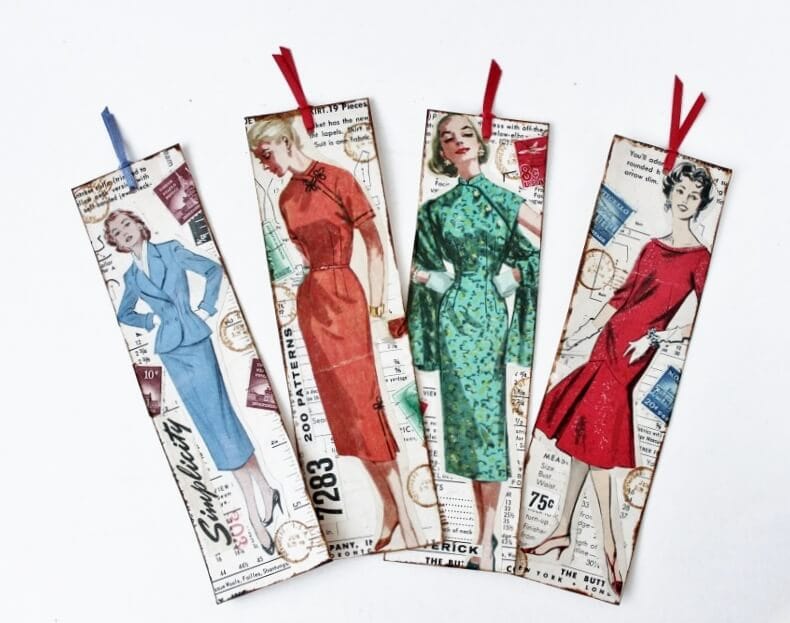
I took the images on the center two bookmarks from a vintage Vogue pattern. Don’t they look tres chic?
How I Display the Bookmarks
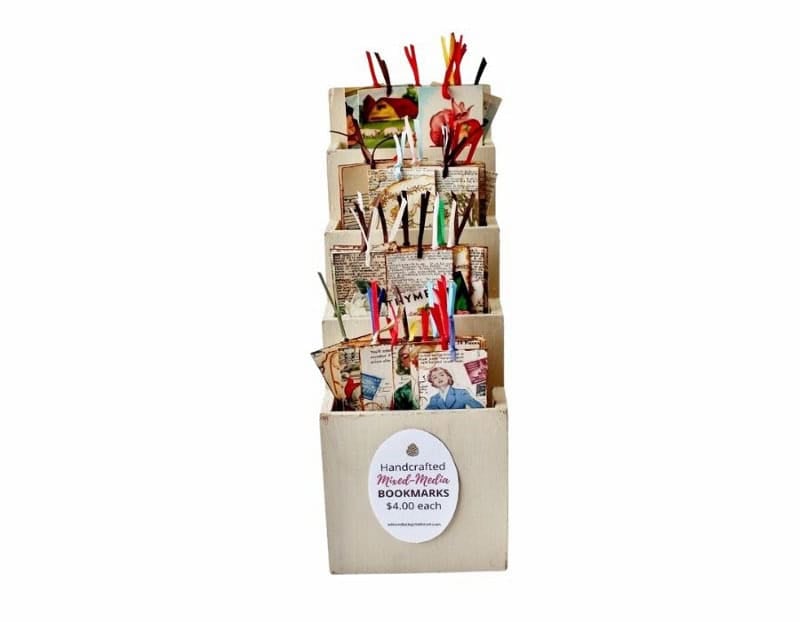
Here you can see the way I display my bookmarks at the craft show. I happen to find this wooden container with the four “slots” at a garage sale, but you can find attractive displays on Amazon. Here are a few:
Reader Submissions
Three sweet readers made their own versions of my bookmarks and sent in photos:

Dorrine from the NYC area made a selection of bookmarks including those you see above. I love that she used tassels as a finishing touch. She’s also inspired me to look for some vintage children’s patterns!

Shannon from Montana sent in these lovelies, and I’m really digging the pattern brand names running across the middle of that one in the center.
And I like the special touch of backing the bookmarks with pieces of the actual patterns, which you may have noticed Dorrine did as well.
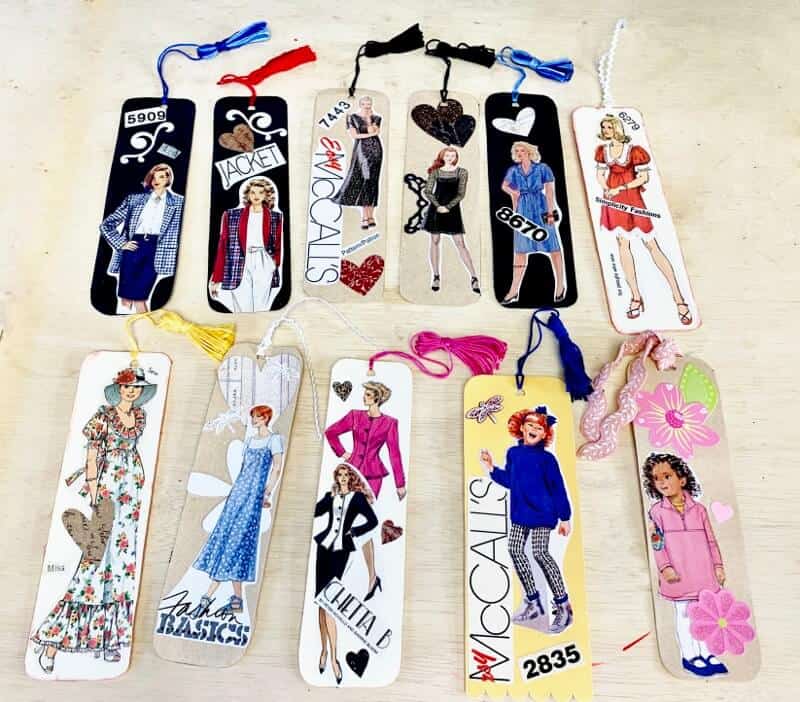
Enjoying the little heart and flower embellishments that Patti, also a reader, added to her bookmarks, along with colorful tassels. She mentioned in her email that every single one of them sold–woo woo!
Fantastic job ladies–thanks for sharing.
Anyone else who wants to share this or any other project on my blog can email them to me or post them in our Facebook group, Your Vintage Headquarters.
Other Projects I Know You’ll Enjoy


Final Thoughts
These delightful bookmarks are such great sellers, I make them every year for a Shaker Holiday Market. I put them together ten at a once in an assemblyline fashion to keep the time investment down and the profits up. Whether you make them for yourself, for gifting, or for selling, I’m confident you’ll have fun with them.
Thanks for stopping by–
If you enjoyed this post, subscribe today
and get a FREE copy of my eBook:

Bye for now,

Would you pin this to your fave Pinterest board? Thanks!


Instead of throwing the patterns out, you should use them for packing items that you ship. It’s just tissue paper, after all, and adds a great vintage vibe to your packaging. The sheets also make great gift wrap and I’ve seen them sold in shops for that purpose. They also make great decoupage for trays, boxes and plant pots. Sewers like to decorate their sewing spaces!
Great idea!
Love this idea to re-use the tissue!
Great ideas Joyce!
Fab idea! I love the idea of using the tissue to wrap my Etsy goodies. Thanks
You’re welcome Jules! So glad you like the ideas you found here 🙂
great idea ‼️‼️ I wish I had kept several whole patterns I threw out this summer 🤔🥺
Aww, here’s hoping you come across some new (old) ones this year Cecelia! So glad you like the idea 🙂
These are SO cute! Thanks for the ideas!
Aww thanks Shawn!! You’re SO welcome–glad you like my ideas 🙂
I am enjoying making these. Using card stock as suggested. Some of them curl and I’m curious how I can get them to stay flat? Any suggestions will be appreciated.
Hi Jo! Some of mine curl sometimes too. I just carefully curl them in the opposite direction over and over again until they are flat. Let me know how that goes!
Wish I hadn’t gotten rid of my boxes and boxes and boxes of patterns from the 60s and 70s when I sewed clothes-before quilting took over my life! 🙂
Aww that wouldv’e been fun to use images of clothes you actually made! Maybe you’ll come across some at a sale along the way 🙂
These are adorable, Diana!
Thank you Colleen! I’m so glad you like them 🙂
I don’t have a shop, but I have bags of old patterns!! I make costumes for two local schools and think I should have a collection – but it’s a bit much. This would be a great w at to use them. I think it would go cool to add some of the tissue pattern on the back! Just the words from the piece, ” sleeve A cut 2″ , that sort of thing. Now I have a new project!!
Love that idea Lois! The pattern would make a great backing. Mine were all cut up, torn, and wrinkled–whoever owned them was not a neat-nic, LOL.
Cute! And I like JoyceG’s idea of using the patterns as packing paper!
Thanks Rita! Yes, great idea to use the patterns to pack with 🙂
Glad you had a good trip!
I am excited to try this therapeutic art activity and then sell at my booth. So vintage stamps aren’t worth anything? I have boxes full of greeting cards with stamped envelopes my own mother collected through the years. Maybe I could do a collage of them for bookmarks.
Yay! I’m glad you like this bookmark idea Genny. I don’t know much (anything really) about stamps so I can’t help you there. I like the idea of using your envelopes to make bookmarks. I sell them in lots of 10-12 on Etsy for $12. Have fun making your bookmarks!
Great idea…my daughters and granddaughter are avid readers and I think they would love these! Actually, I have a lot of friends who are readers as well and they, too, will be receiving a bookmark!! Thanks so much for sharing this diy!!
You’re welcome Karoly!! Would love to see photos should you and your family end up making some 🙂
I loooove these bookmarks. I want to purchase some for gifts, where are you selling them. So cute! I love your ideas and all the sharing you do. It’s so nice to visit and take some time out for all things vintage. 😊
Hi Laurie! I’m so glad you like the bookmarks 🙂 🙂 I’ve added some to my Vintage Blog Shop, which you can access via my navigation bar at the top of my blog under “Vintage Shopping” or click here: https://adirondackgirlatheart.com/adirondack-girl-heart-vintage-shop/ Thanks so much for the sweet encouragement!!
HI Diana,
Love this idea!!!
Save the patterns you discard – we could use them at the shop for wrapping delicate items!
Ha ha–I will, I will! There were only a couple–I have to make hard choices when it comes to the hoarding reflex, LOL.
Thank you for another awesome idea! As a third-generation dressmaker, I have a collection of vintage patterns as well as other embellishments. These would be a cute craft to offer in my sewing shop for people pickup, as well as cute gifts for sewing friends.
I’m so glad you like the idea Josephine! I think your customers (and friends!) would LOVE them–send me a photo if you end up making some 🙂
These are adorable! I still have my vintage (and my mom’s!) vintage patterns. Would be good to find a use for them!!! And what a great gift for anyone who sews or quilts! I firmly believe in Mother’s spit; coming at a kid’s dirty face with spit on a tissue is the FASTEST way to make them clean up themselves!
And have you learned the trick about spit on a piece of spaghetti? When I am making dollhouse flowers, I put my spots of Tacky Glue on the foliage, then pick up a tiny paper flower with a piece of spaghetti dampened with spit. Well, glue is stronger than the starch and you can place the flower JUST where you want it–quickly! This, of course, generalizes to sequins/confetti/beads/rhinestones on cards and scrapbook pages, etc. It is one of my favorite tricks!
Glad you like the idea Kathy! And thanks for the moral support regarding spit, LOL. And thanks, too, for the spaghetti tip!! I’m always trying to glue tiny things with my too-big fingers 🙂
Kathy A – what a great tip! The spaghetti with spit, lol. Going to write that one down. And JoyceG’s tip about using the pattern. Your readers are full of great ideas Diana! So glad I subscribed to your blog. Jan in MA
These are cute! How thick is the cardboard you use? I was wondering if that might be an issue. I’ve been looking for patterns from the 40s. I want to frame a few and hang them in my sewing/craft room. The owner of my shop has some for sale, but I’d rather save $20 and do it myself!
Oh! Never mind! I read ‘cardstock’ as cardboard. That’s what I get for trying to speed read!
I cringed when you said you threw out the patterns! Like others, I would have snapped up your trash in a heartbeat. I received something once packed in a little box with the patterned tissue, and I’ve been saving it since. Vintage rickrack would also be cute on the bookmarks, or use it through the hole at the top.
Ha ha–I just made all the rest of the cut and crinkled up patterns more valuable, LOL. Great idea, Patty to use rick rack 🙂
I Love these bookmarks! Such a beautiful idea.
I’ve seen the actual patterns used to make paper flowers. Very “vintage” looking. Of course, then you have to store all the patterns….LOL!
Thanks Amy–I’m so glad you like the idea 🙂 Yes, I’ve seen those flowers from patterns. Unfortunately mine were all cut up and crumpled 🙁
Love! Love! Love! I bought a box of gift cards that have a McCall’s pattern on the front and the back of the cards are the directions etc. And the envelopes are darling as well. I’ve had fun using them for my crafty friends. However! I have reading friends who also sew/quilt…..thanks for this wonderful idea. I have a huge box of old patterns I bought for $20 because the little lady was quite staunch on her price and I loved how she ‘forced’ me to pay her. LOL You always amaze me! 🙂
Those cards sound cute as can be (another idea for all of us!). Don’t you love little old ladies (wait, I might be one of those, LOL)? Now you have what you need to make the bookmarks! Time to thank the little old lady…
Such a cute idea, Diana! I have used the pattern paper as wrap, too Cute wrap for items you sell!
Thanks for sharing!
Glad you liked the project, Linda! Yes, great use for the patterns and instruction sheets 🙂
Love these, Diana! Great way to enjoy these adorable illustrations. I’ve got a whole bag left from my store; we used the tissue as wrapping material. Pinning, and sharing with my email list!
Aww thanks Lora! So glad you liked the project 🙂 Be sure to send me a photo if you end up making some of your own–
These are so artsy ~ love! The perfect gift for a sewer. Pinned. I’m visiting from Farmhouse Friday.
Glad you liked them Allyson! Thanks so much for the pin 🙂
These bookmarks are so unique and gorgeous!! What a creative idea, great job!!
Thank you Pamela! SO sweet of you to say 🙂
Finally! Something I can do with all these patterns I have around. Love this. SO stinkin cute! Pinned!
SO glad you liked the idea, Cindy! And thanks for the pin, too 🙂
I luv this idea. Bravo🙌🏻
Thank you Ann–so sweet of you to say!
Your bookmarks are really cute, but I’m dying thinking you either cut up or threw away the junior petite pattern! They are so hard to find. I have a 16 year-old granddaughter who is 4’10” who would love to have junior petite patterns. Do you have any others in your stash? I’d be interested in doing a deal.
I only had a few–some with patterns, some without. I’ll keep my eye out for those junior petites though!
Joannes Fabrics still has vintage Simplicity items–like notecards in their current flier that came today!
Cool! Bet you could make some cute ones of your own with some vintage patterns…just sayin’ 🙂
What a wonderful idea! You just gave me an idea for using up some very old sheet music I have! What better idea to do something like this while cooped up in the house for another 2 weeks! (We’re in lockdown around Detroit until after Easter).
I’m so glad you like the idea, Sharon! I’ve been going crazy using all kinds of paper–kid’s books, antique receipts, seed packets, and more 🙂 Now you’ve given ME a great idea; I’ve got some old sheet music lying around, too. Same lock down here in NY. I’ve been crafting like crazy!
I love these bookmarks so much, Diana! Boy, do they bring back memories. My Mom sewed a lot of her clothes back in the day so patterns like these were plentiful in our house growing up. Such a creative way to upcycle them! Pinned 🙂 I hope you are well and stay safe!
I’m so glad you enjoyed the post, Marie! My mom was quite a sewer, too, in fact she had me take a class at our local Singer store when I was 10 🙂 It’s a valuable life skill, that’s for sure. Thanks so much for the pin!!
I enjoyed reading all the comments with so many ideas! I found you while reading Diana from My Own Style blog and will be joining your tribe!! We are finally able to go to estate sales & the thrift stores are open (must mind our social manners) and I will be on the hunt for vintage patterns. These are just to cute!! Have a great Memorial Day weekend!
I’m so glad you came by for a visit and liked what you saw, Cecilia! I’m so jealous that you can do some vintage shopping–we’re not there yet here in New York, but hopefully soon 🙂 Here’s hoping you find some vintage patterns soon and hope your weekend is safe and blessed–
Oh my word! I adore these and can’t wait to give it a whirl! Found you via Pinterest.
I’m so glad you like them Mandy–not only are they one of my favorite projects, but it’s one of my most visited articles. Send me some pics of yours if you think of it 🙂
I so love these for small gifts for all my friends but where in the world do you find these vintage patterns? I have searched everywhere.
Thanks.
Joy
I find them at garage and estate sales, as well as thrift stores, Joy. You could also try eBay and/or Etsy. I hope you find some soon cuz they are SO fun to make!
I am thinking of using some of my late vintage patterns to make the bookmarks to use as Christmas ornaments for family members. Instead of Mod Podge could you laminate them???
Sure! Give it a try 🙂
Why not just make color copies of the original art, pattern, paper ? Then you save the original and can make all the bookmarks you want.
That’s always an option Teija!
How do you keep them from curling? Mine looked terrible. I may have to laminate them. Any suggestion suggestions?
Hi Sarah, it sounds like you may be using too much mod podge? Use the bare minimum and then touch up any spots here and there that didn’t get glued down properly after they’ve dried. Occasionally mine curve a bit and I slowly bend them in the opposite direction a few times to straighten them out. You can also try weighting them down with something heavy–just be sure to dust them with cornstarch first so they don’t stick to anything or each other. Let me know how things go!