
Vintage Framed Flags [+ How to Tea Stain]
Since we’re in the season of patriotic holidays (Memorial, Flag, and Independence Days), I thought I’d pass on a crafty wall art idea. In the past year or so since I started putting them together, I’ve made over a dozen of these vintage framed flags for myself, for friends, and to sell in my shop.
Sometimes it seems like the American sense of patriotism is waning. Growing up, my father never failed to hang the flag for these holidays, and I remember the sense of pride I always felt when participating in a Girl Scout flag ceremony.
On our street of about twenty homes, we were the only one to hang a flag last week-end for Memorial Day. So it always makes me happy when someone buys one of my flags because it means there’s one more flag hanging somewhere to remind us of the special nature of our democracy.

And for the record, I don’t believe we’re perfect or that all the decisions made by our government are “right,” but I do believe in some of the guiding principles of our nation, including our embrace of democracy, our welcome of refugees, and our influence on world stability.
But I’ll be stepping of my soapbox now…on to craftier things, LOL.
Pick Up Vintage Flags at Sales & Thrift Stores
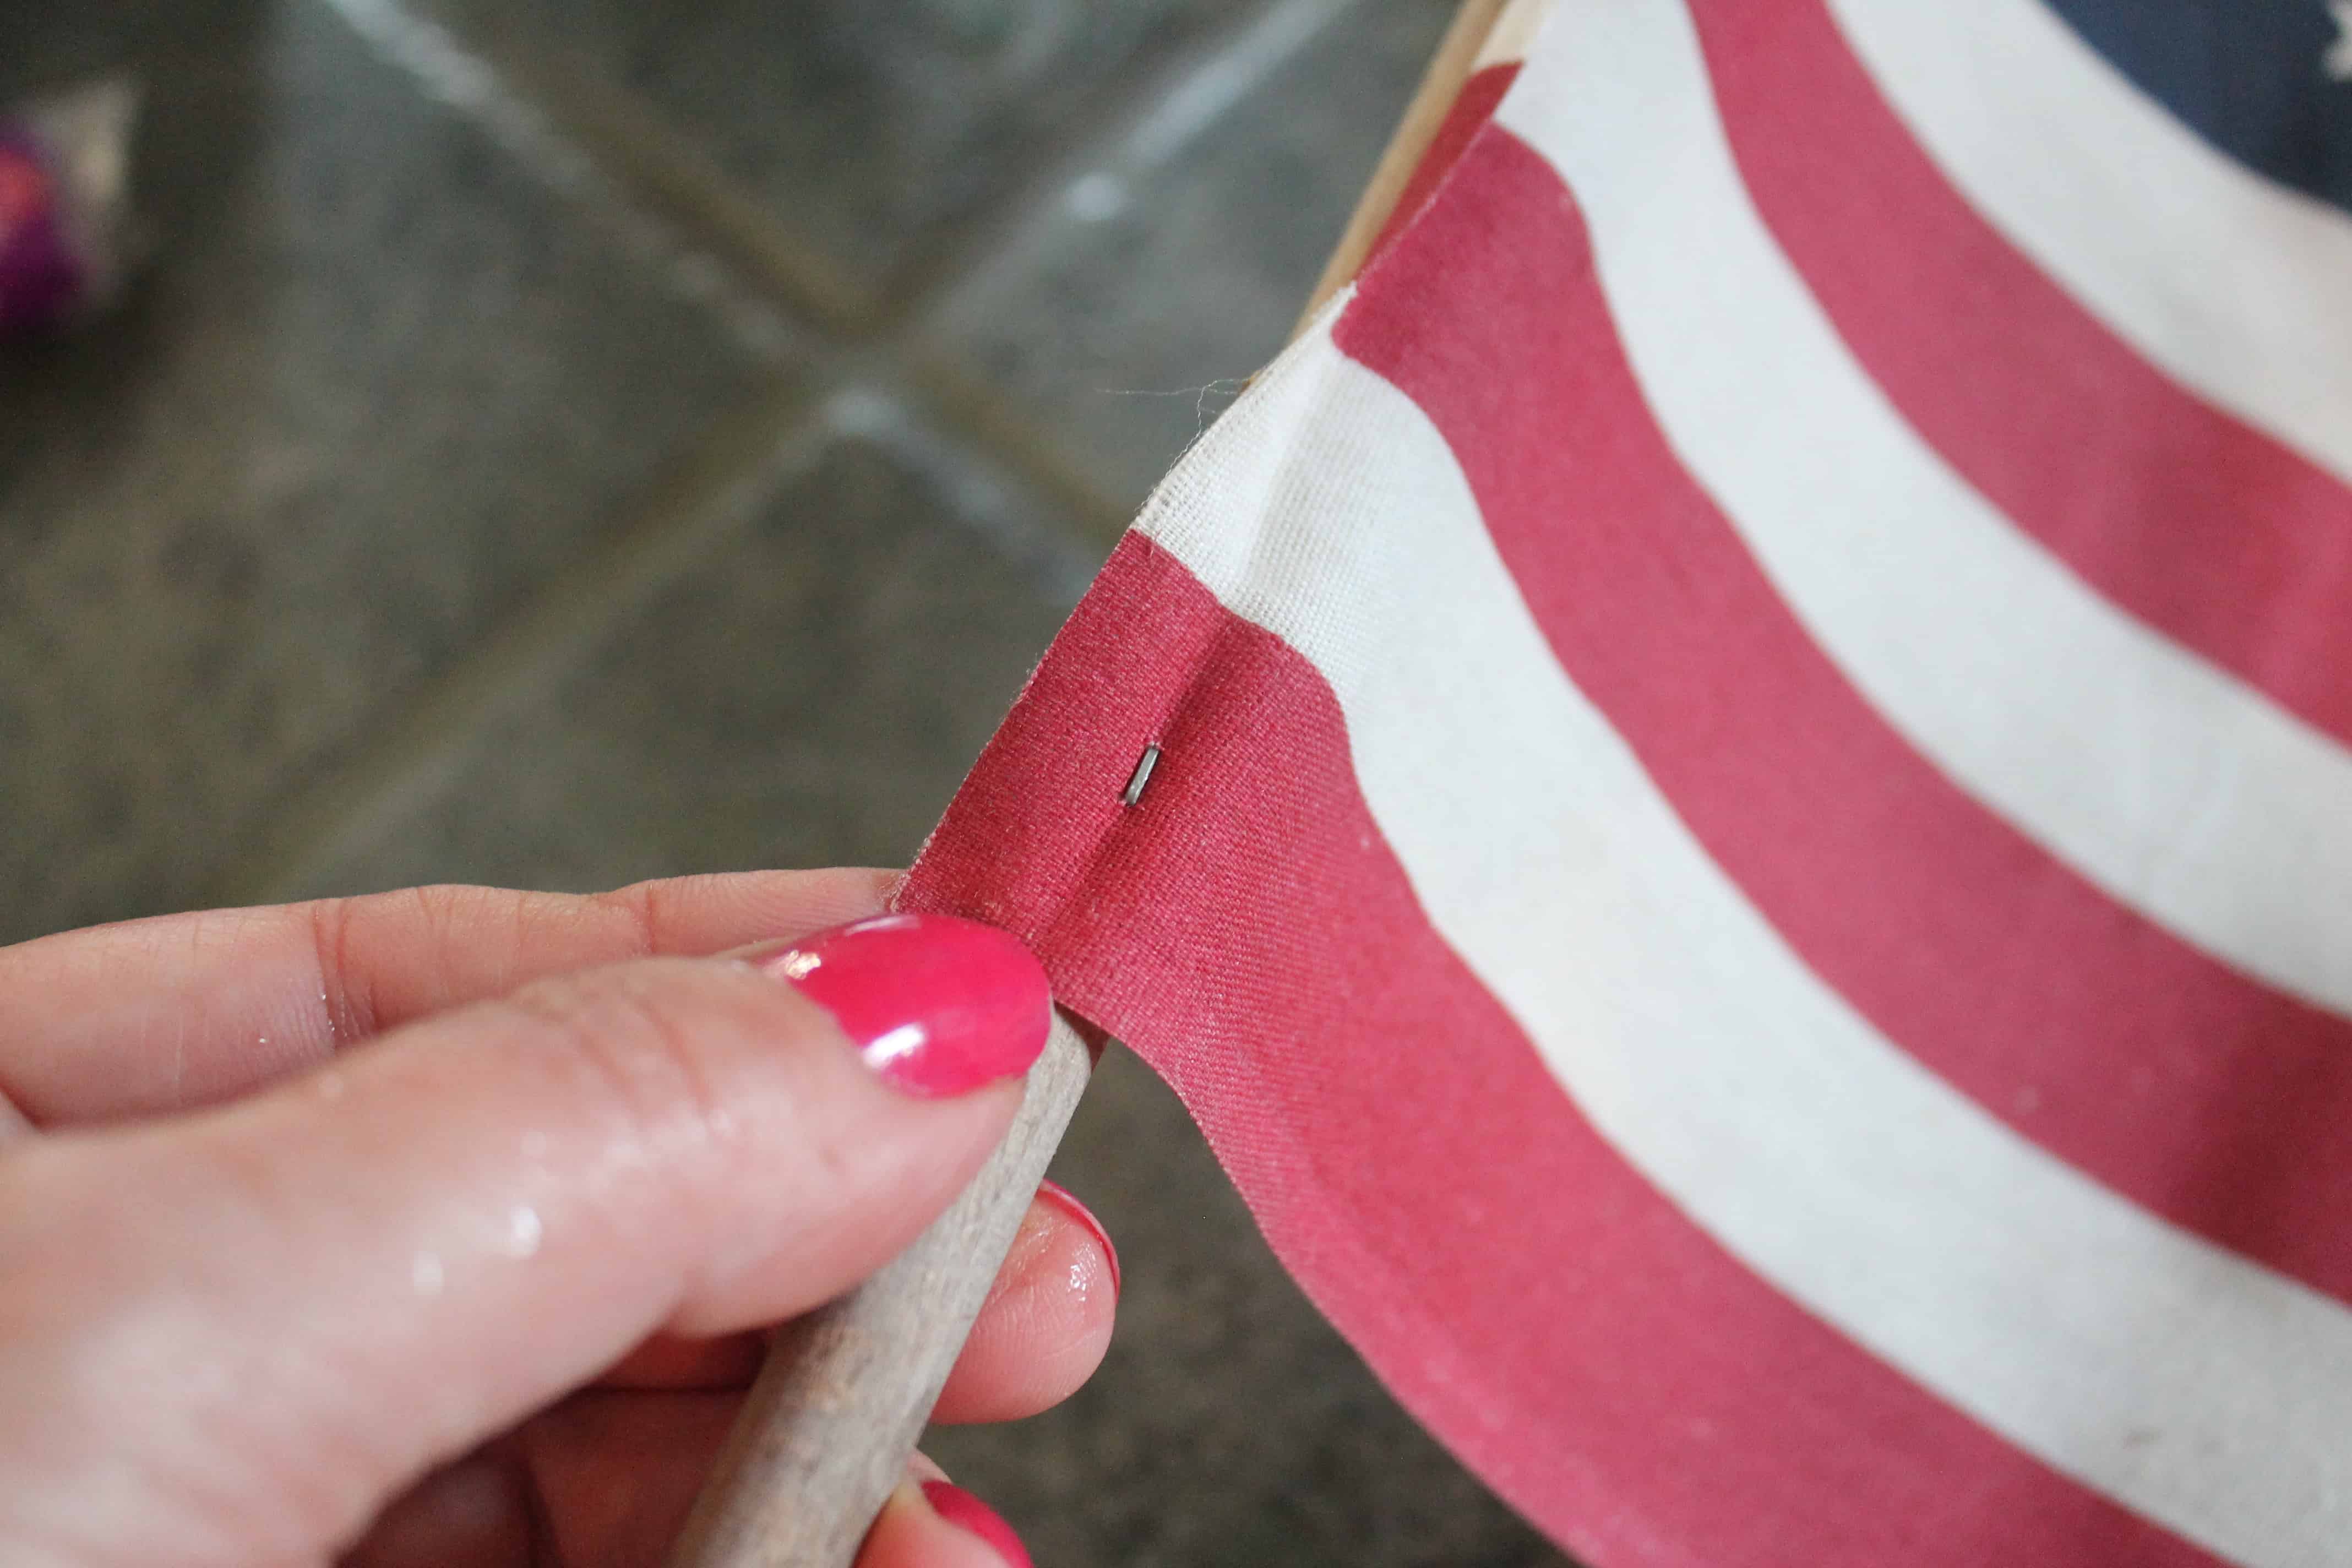
Whenever I come across flags of any size or condition at garage and estate sales, I buy them, if they’re cheap (you know me!). Commonly they are stapled to dowels, like the one above.
If you plan to frame some flags of your own, then also keep an eye out for vintage black frames at sales and thrift stores. This will allow you to mix and match flags and frames by size whenever you decide to create one (or two or three…).
I sell framed flags regularly from my antique booth for about $10 for small ones and up to $25 for larger examples. They sell very well from my farmhouse style booth.
Tea Staining Flags
")
If the flag you are framing already has an aged, antique look than you can skip this step. However, I recommend tea dying it if it looks new in order to add character to the piece.
Recipe
To make a tea bath to accelerate the aging process, add two cups of boiling water to four standard black tea bags.
")
After the bath gets good and dark, add your flags (this amount of “dye” is good for several flags), and let them soak for about 15 minutes, or until they are the color you want.
")
Then, squeeze them out and lay them on a towel to dry. Squeeze some of the stronger tea “dye” from the tea bags in splotches on the flags and lay the bags down randomly on the flags to dry with them.
This process will create some nice “splotches” or browning that I like.
")
Here’s a tea dyed flag ready for ironing.
Iron the Tea Stained Flag
")
Give it a good spritz of water to make the ironing easier.
")
Then iron it nice and flat.
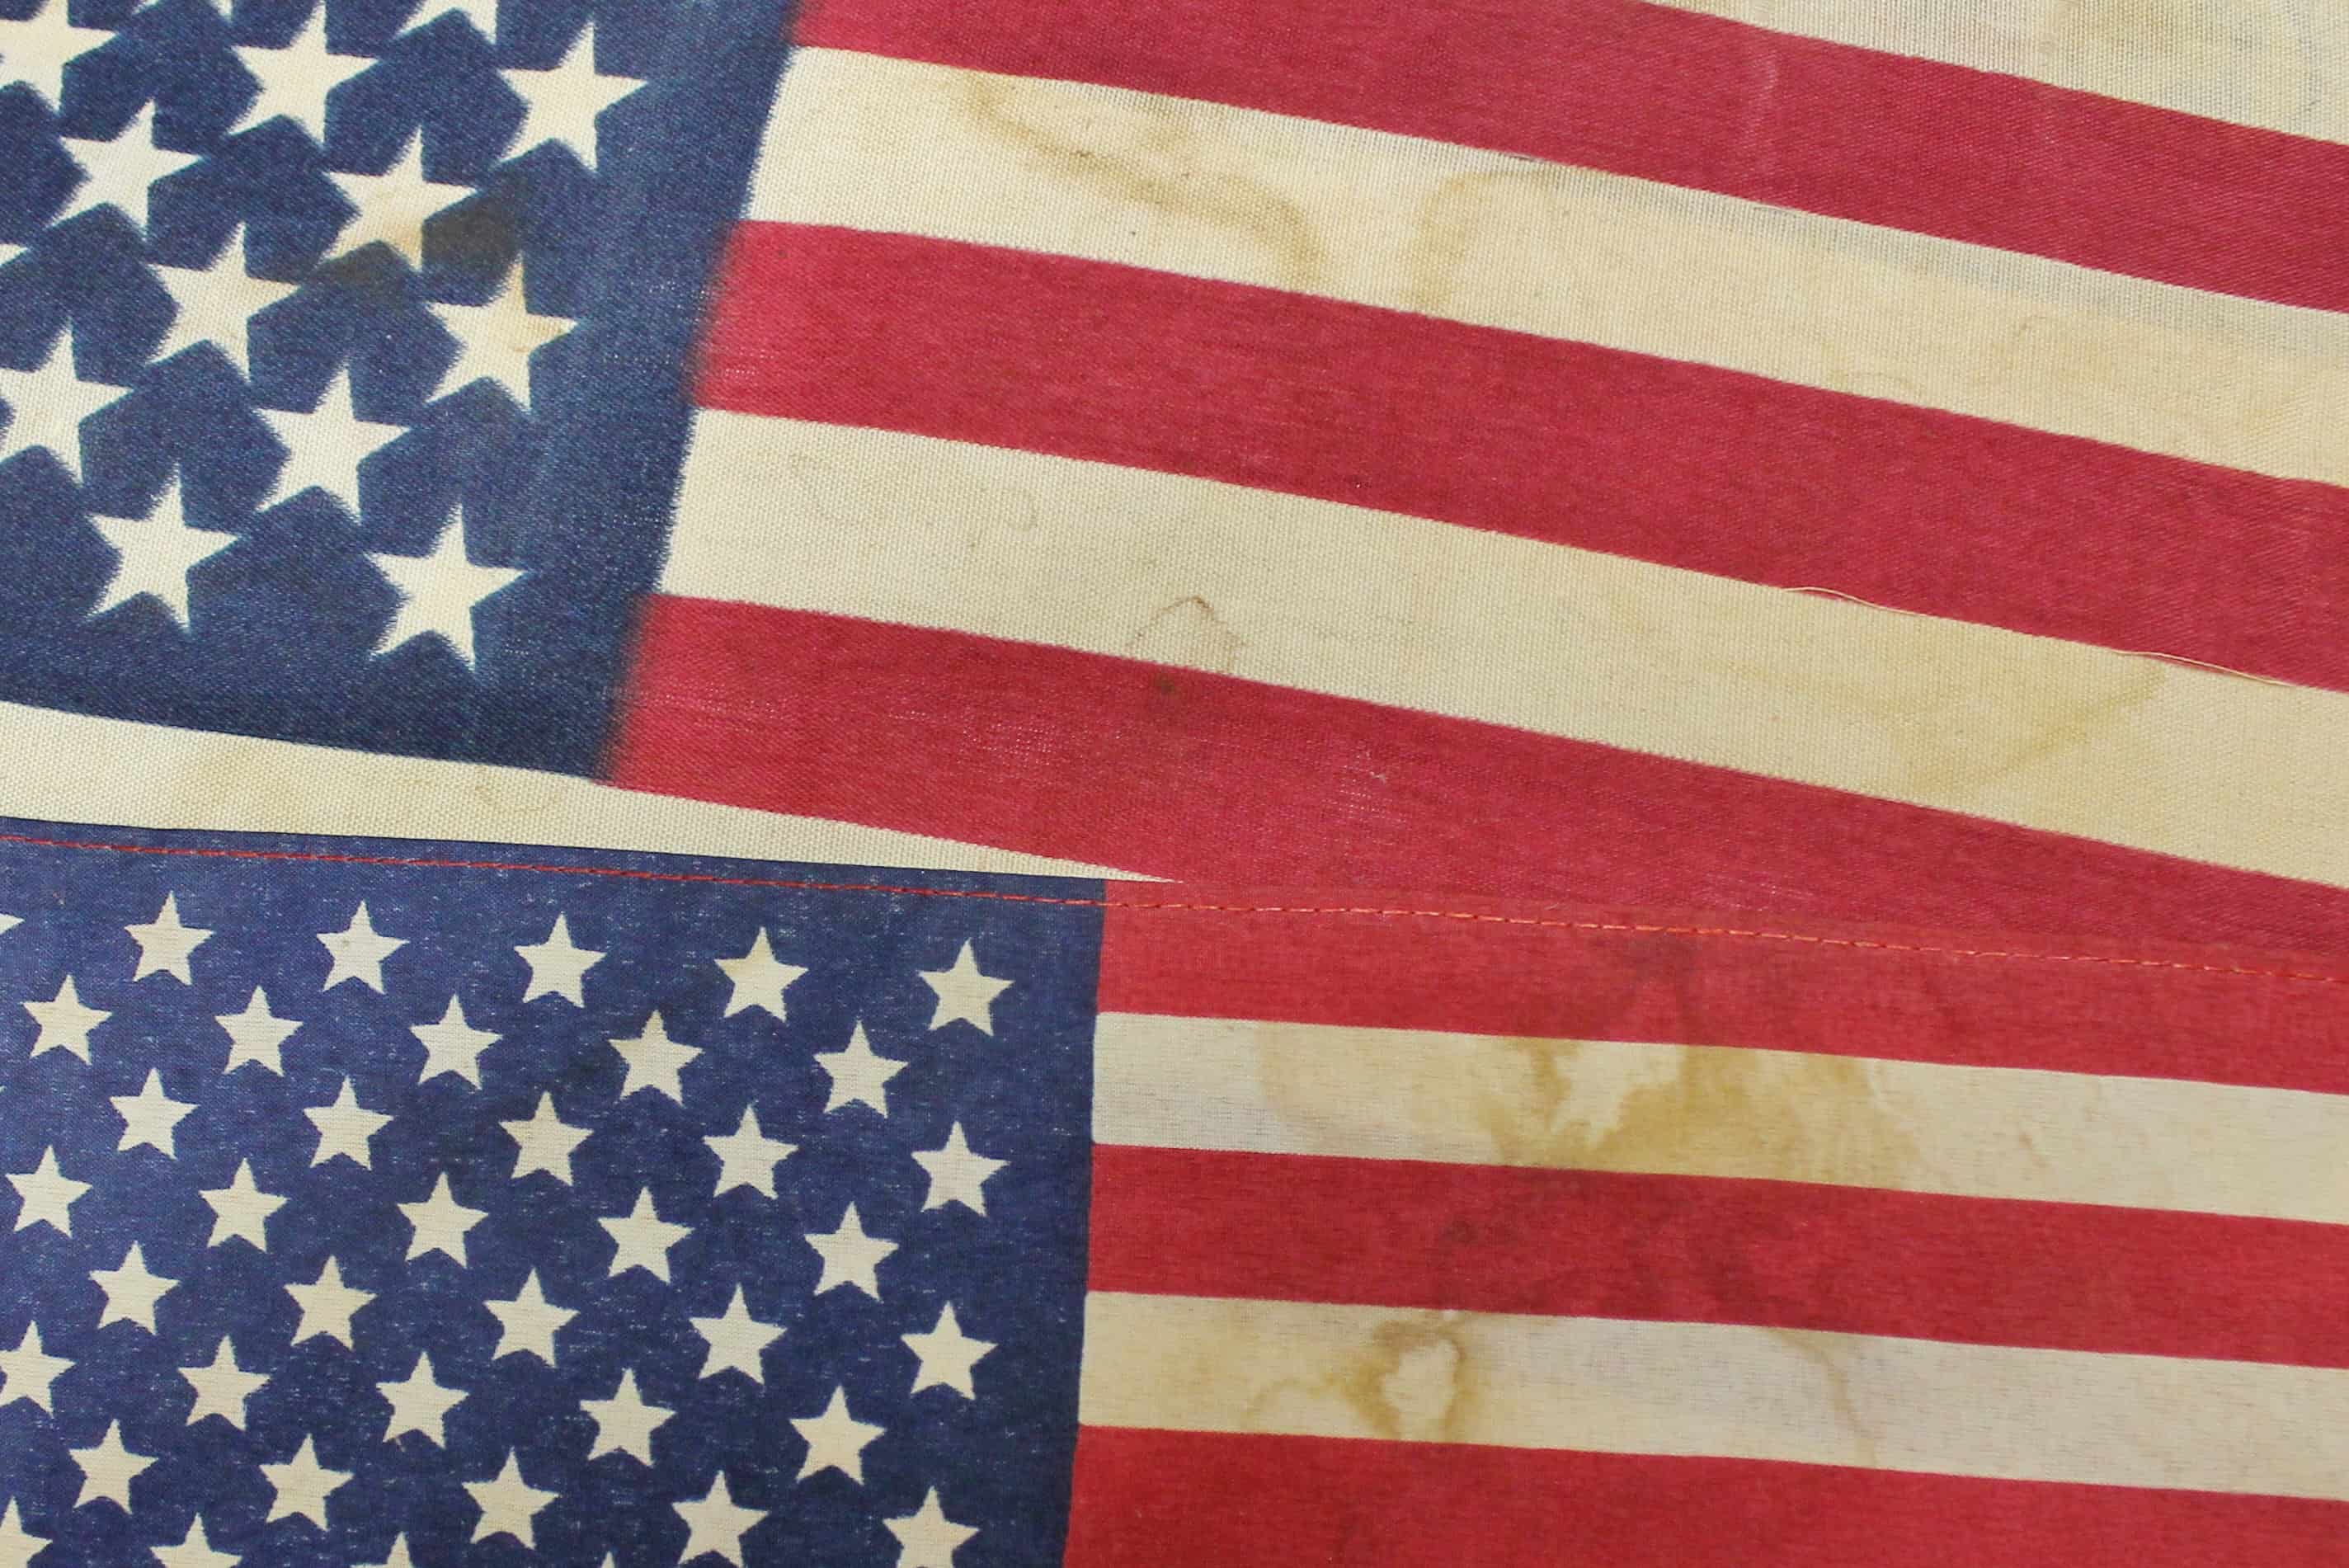
Here you can see some of the effects of the tea dying. [It’s hard to see the dyed areas in photographs of framed flags, due to the reflections on the glass.]
Attach the Flag to Cardboard Backing

I use double-sided adhesive tabs (for scrapbooking) to hold the flag in place on a piece of cardboard–usually the one that came with the frame(!).
I don’t get too picky about the cardboard–gray is fine, black is best, beat-up is better. Insert your mounted flag into the frame and then back it with some brown craft paper, and you’re done.
[Get specific instructions on how to frame like a professional HERE.]
Insert the Mounted Flag Into the Frame
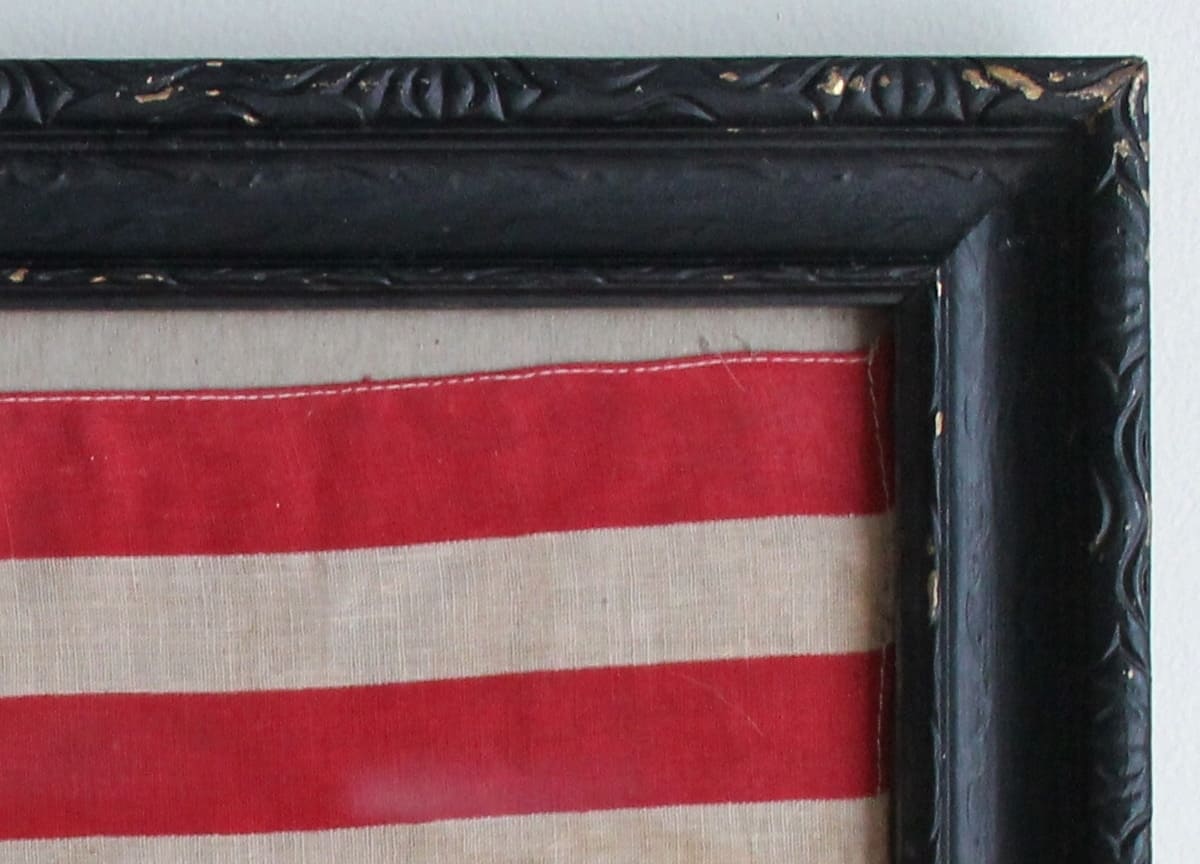
The final step is to frame your flag with one of the black frames you picked up. This is one of the largest flags I’ve framed (12″ x 16″), and I was happy to have this wider, more ornate frame for it (16″ x 20″). Some gold paint shows through from underneath the black on this one–a nice touch.

I typically use narrower, simpler black frames like the one you see here, which I sold at the Shaker Christmas Craft fair in 2015.
And here it is, ready to use for the next flag-related holiday–Flag Day on June 14th.

Flags conjure up all kinds of images, like parades, strawberry shortcake, and Uncle Sam.

I’ve probably mentioned before that the Uncle Sam character came into being during the War of 1812. As the story goes, Samuel Wilson, a butcher in the nearby city of Troy (NY), supplied beef to American troops in barrels marked “U.S.”
The soldiers began referring to the meat as “Uncle Sam’s,” and the character was born. [You can read more about Troy in Historic Homes of Troy’s Second Street and Troy Night Out.]

It’s a simple, but powerful image. To me, a symbol of freedom and democracy, it raises all kinds of memories: of pledging allegiance in elementary school, marching in 4th of July parades, witnessing flag presentations at the funerals of veterans, and living through tragedies like 911.
Those sorts of events seem to pull us together, if only for a time. I consider it a privilege to raise the flag on a few special days of the year.
Thanks for stopping by–
If you enjoyed this post, subscribe today
and get a FREE copy of my eBook:

Bye for now,


I’d love it if you’d pin me!


Thanks for showing the tea dye step, never knew for sure how to do that right. Love the flags and also loved the story about “Uncle Sam”! I am always drawn to things with him on them and did not know that.
So glad I could help out, Karen! I’m a big fan of Uncle Sam, too–he’s a charming fellow 🙂
This was an interesting post and I took note of the step-by-step tutorial if I ever run into one of those small flags again. We put our flag out for Memorial Day, but I don’t think I saw any others on our street. I love your Uncle Sam statue!
We had very similar experiences, didn’t we, Florence. I’m glad you enjoyed the post!
I am glad to know how to do the tea stain process. I love the Uncle Sam vignette.
Glad I could provide some useful info, Debra!
I bought a 48 star flag at an estate sale for a measly $2.00. Would it be safe to frame? I’m not sure what else to do with it at this point! Thanks for any advice!
I recently bought a 48 star flag with appliqued stars and sold it to another dealer for $45.00. I think your flag would look fabulous framed and you might want to consider having it professionally framed to protect the flag. That said, if you can’t afford that and yours is worth only about $50-100.00 (hard to tell without seeing it and I’m not an expert), then framing it yourself for decorative purposes would be fine. It might, however, be difficult to find a frame large enough. Another way to display it would be to use a quilt hanger (LL Bean sells them) or use it as a table cloth or dresser linen (folded in half). Good luck! I’m sure whatever you decide will be great, Laura–
Gorgeous, Diana. I couldn’t do that – Canada has pretty clear laws about handling our flag, and I think I could go to jail for dyeing one, but this project of your is stunning. You have incredible vision!
I actually thought twice before posting about this process because some people are touchy about the flag and how it’s handled. Like I said in the post, by framing them, I’m making it more likely that they’ll be displayed, and I think that’s a really good thing. We have rules in America about handling the flag, but no laws that I can think of. We’ve been wrestling with the whole “flag burning” issue for years, but it’s still legal in America. I’m glad you liked the projet, Donna 🙂 You’re a sweetie–
We keep all of our worn out flags and hand them over to the American Legion and every year on June 14th (flag Day) they hold a proper ceremony on disposal of the American flags.
https://www.defense.gov/News/Feature-Stories/Story/Article/2206946/how-to-properly-dispose-of-worn-out-us-flags/
NO, a person Does Not burn the flags themselves.
If you ever have the opportunity to watch the American Legion do a flag burning ceremony; it’s worth watching. I think the boy scouts of America go through pretty much the same manner. Most ceremonies are normally held in the evening hours.
I, myself like the older flags framed and displayed, but do not hang where direct sunlight hits it.
Thanks for the info Colleen!
This turned out lovely Diana, and great tutorial!
Awesome, I love it!! Thank you for sharing your info with us, can’t wait to find a flag!!
I never even thought about tea staining a flag. What a great idea! Thanks for sharing your tips for framing with Talk of the Town.
I love our flag and framing one is a great idea! I especially like the aged look. Thanks for sharing it with SYC.
hugs,
Jann
You always seem to post things I need. I was looking at a small flag carried in WW2 by my hubby’s uncle and want to frame it. Your ideas will get me started!! Thanks so much and blessings to you and your family.
That makes me so happy to hear Sharon!! That means I’m doing my job well, I think 🙂 Blessings on you and your family as well–
I just wish I had more time to read everything you have written about so many aspects of the antiques/collectibles/crafting/selling arena!
Everything I have watched or read has been both helpful and fascinating. Thank you!
Keep on keepin’ on please😃
My suburban town has a real estate company that places the little flags at everyone’s mailbox the week of July 4th. I have a collection of them over the years. What a wonderful idea to use with my granddaughter, while giving a little history lesson in the process!!! Thanks so much! …. Jan
Thank you, Diana, for sharing this project. I am so going to do that and I agree that more people would actually hang this up in their homes for the privilege of living here if they don’t fly one outside. Great idea!!