
Vintage Christmas Bookmarks: From Children’s Books
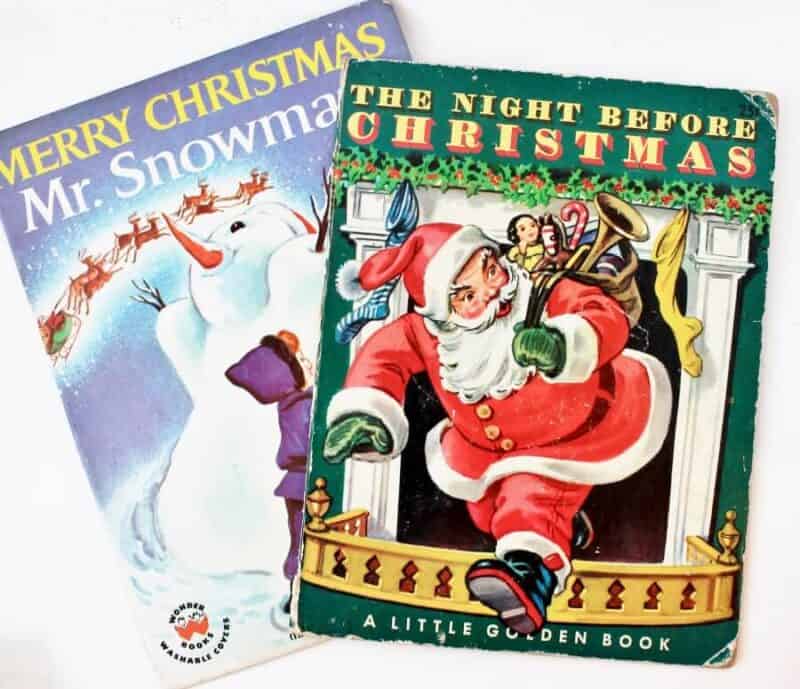
It’s happened to all of us at one time or another. We come across old worn out children’s books with missing covers, torn pages, or crayon markings. If only we could rescue them.
Today I have a great project–vintage Christmas bookmarks–that doesn’t exactly rescue the books, but it definitely prolongs the life of those charming illustrations we find in books like T’was the Night Before Christmas and Frosty the Snowman.
I sell these for $4 each at the Holiday Market I participate in every year and they sell very well. UPDATE: In 2024 I raised the price to $5 and sales were still excellent.

Note: This post contains affiliate links for [the same or similar] products used to complete this project. This is both for your convenience as well as to support my website, since I receive a small compensation whenever you click on a link and make any sort of purchase, for which I thank you 🙂 See my full disclosure here.
Supplies to Make Vintage Christmas Bookmarks

Materials
- Vintage children’s Christmas books (I used vintage Little Golden Books)
- Vintage music paper (here’s a new alternative)
- Manila cardstock (I use manila folders)
- Mod Podge (clear satin) (antique matte)
- Paint brush (small, flat)
- Foam brush
- Tim Holtz distress ink pad
- Postage cancellation stamp
- Small 1/8″ hole punch
- Ribbon (1/8″)
- Tacky glue
Step 1: Cut Cardstock
Use a paper cutter (if you have one) to cut the heavy cardstock into bookmark sized pieces. I make mine 2″ x 7″.
Step 2: Glue Music Paper to Cardstock Bookmark

Use Mod Podge to attach a piece of music paper to your bookmark.
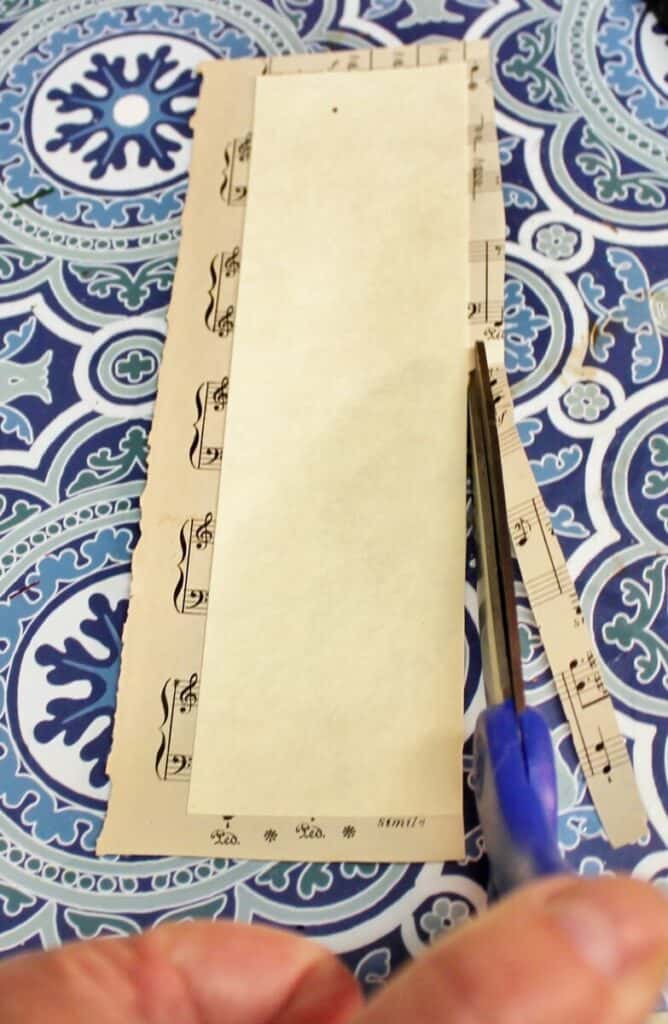
Allow it to dry, then trim off the excess music paper.
Step 3: Select Illustrations
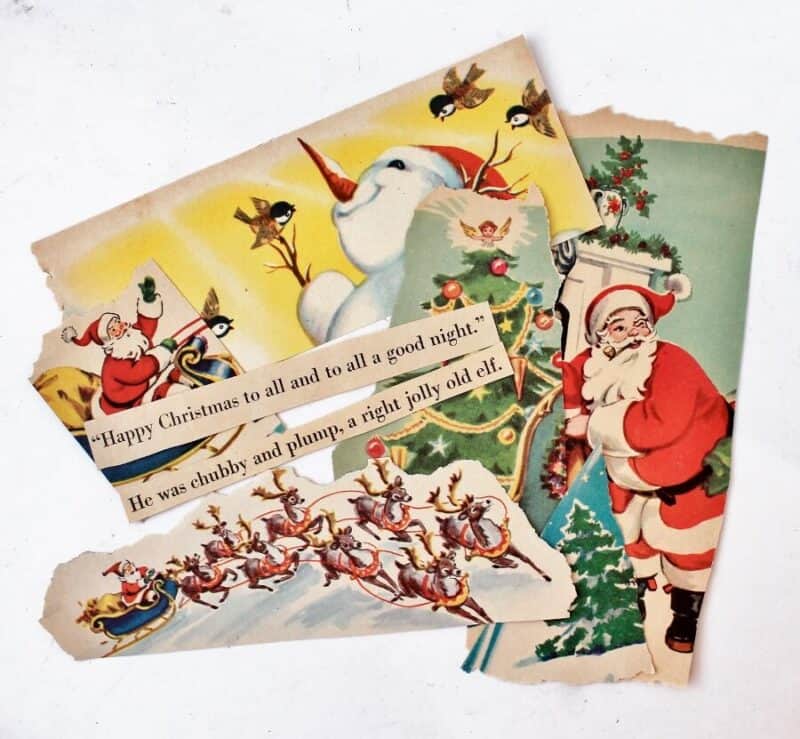
Select the illustrations from the children’s Christmas-themed books that you want to use for the project. [I used images from Little Golden Books.] I like to tear around the images and “age” the edges with some Tim Holtz distress ink.
Related Resources
- How to age paper with distress ink
- Little Golden Book Guide
- Little Golden Book Price Guide: In the Member Library, get access when you SUBSCRIBE
Decide which illustration and accompanying phrases you want to use on each bookmark.

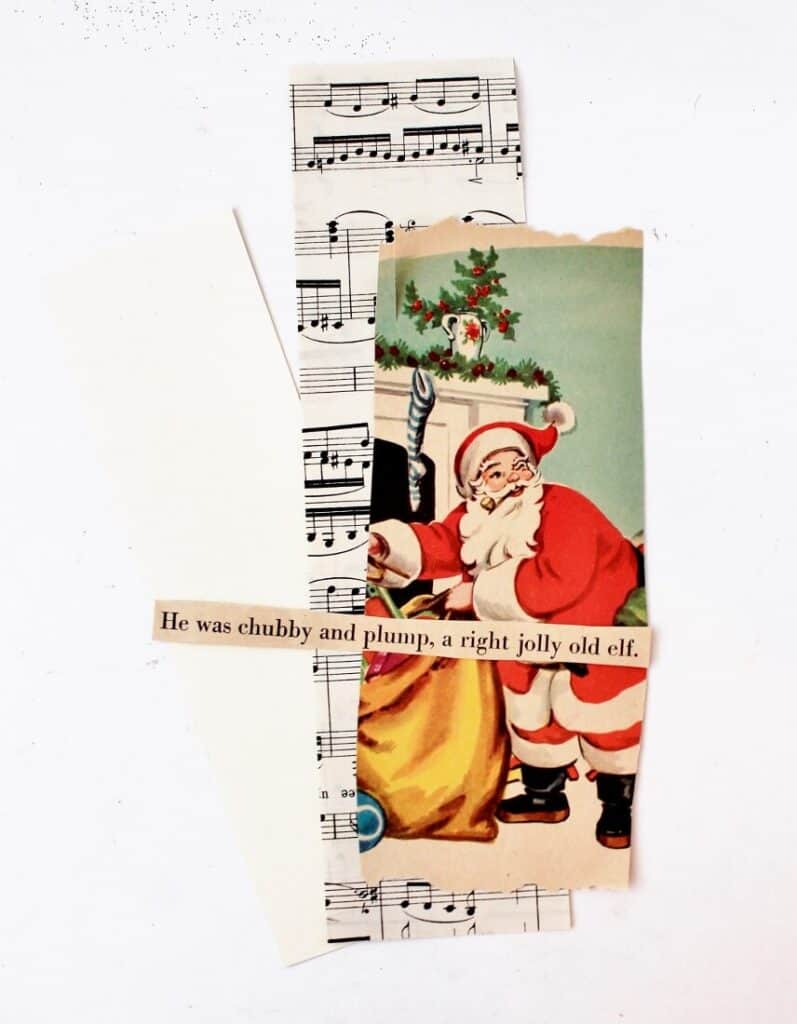
Step 4: Glue the Illustration Over Music Paper
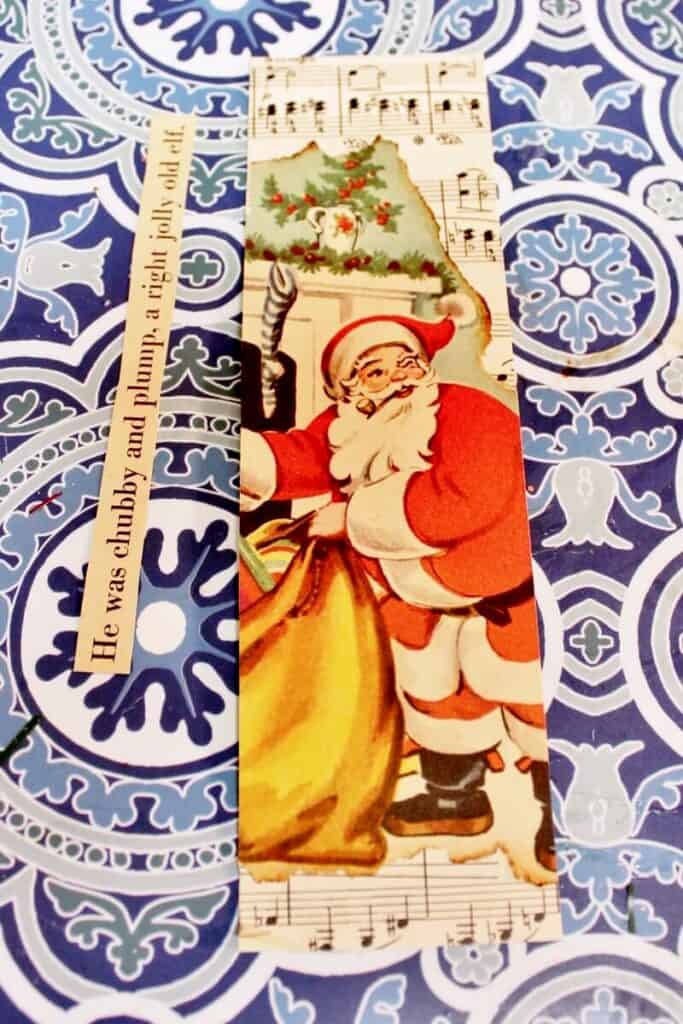
Use Mod Podge to glue the image in place. Glue on any cut out words or phrases from the book that will add charm to the bookmark.
TIP: I hold the text with tweezers to make gluing and placement easier.
Step 5: Stamp & Age the Bookmark
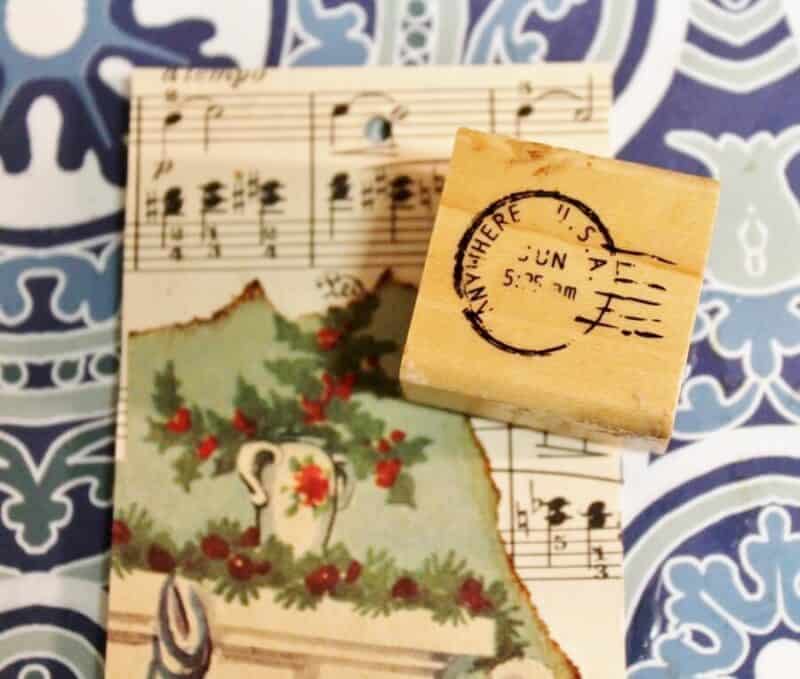
Use a postal cancellation stamp and the Tim Holtz distress ink to embellish your bookmark. You only need to stamp a few to get the look you want.
Step 6: Paint Front With Mod Podge
Give the front of the bookmark a coat of Mod Podge to finish it off. Use antique Mod Podge to give it an all-over aged look. Alternatively, if you have none available, spritze the bookmarks lightly with coffee aging spray (see below).
Step 7: Apply Coffee Aging Spray (optional)

I’ve found that when I’m not careful, I end up with splotches of Mod Podge on the back of my bookmarks. Since I sell them, I want the backs to look nice.
I spray the backs with “coffee dye” that I make with powdered coffee. This gives it an appealing, aged look.
Coffee Aging Spray Recipe

Ingredients:
- Water
- Instant coffee
- Small spray bottle
In a small spray bottle, I mix about a teaspoon or so of coffee with a tablespoon or two of water and shake. Test to see if it’s the color you want. I only make a little at a time because it can go bad quickly.
Step 8: Punch Hole & Attach Ribbon
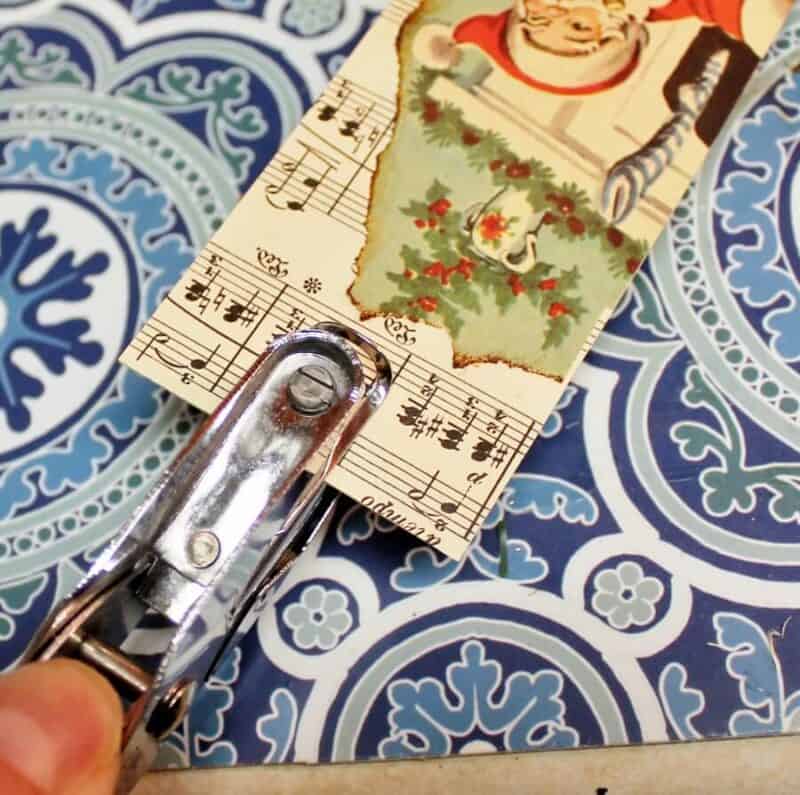
I like to use a small 1/8″ hole punch because it gives the bookmarks a more professional look. After punching the hole, create a tassel using thin ribbon.

Using a toothpick, dab a tiny bit of glue underneath the ribbon on the front of the bookmark and press the ribbon onto the glue. This will keep it from sliding out.
Step 9: Brush With Cornstarch
The Mod Podge makes the bookmarks a bit tacky. Brush them lightly with cornstarch and then tap off the excess to prevent them from sticking to each other.
This is especially important if you plan to sell them as they’ll stick together in your display if you don’t apply cornstarch.
Final Product: Vintage Christmas Bookmarks
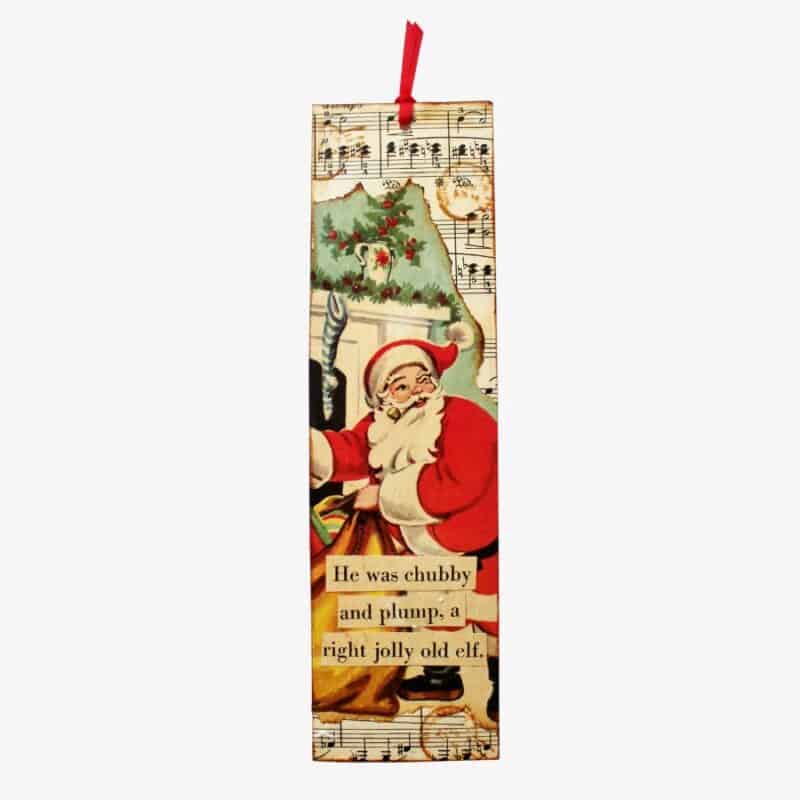
Here’s the finished product! Cute right?
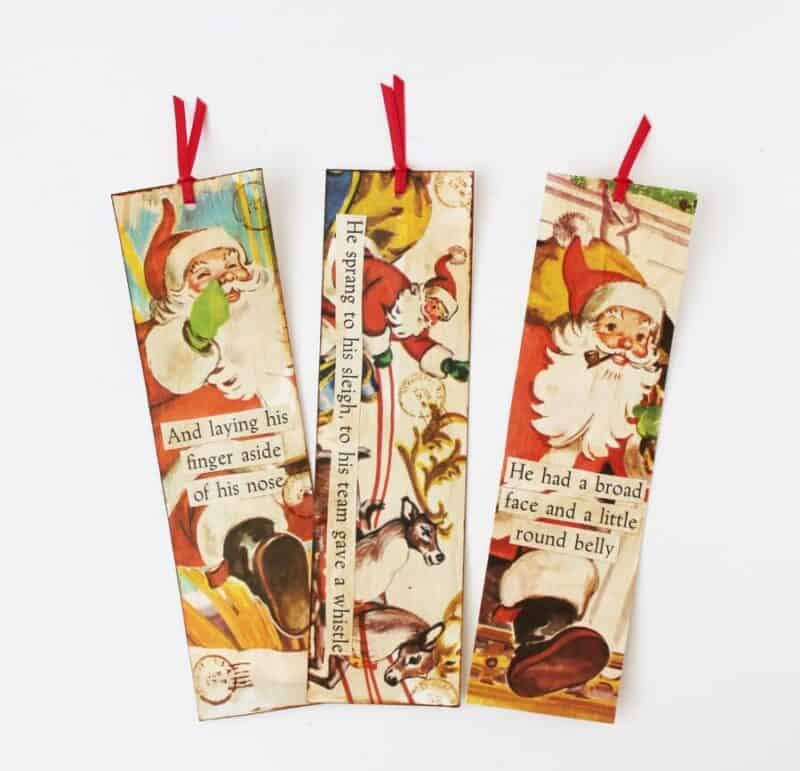
Here’s a set of three finished bookmarks. I used the antique Mod Podge on this bunch. It makes the overall appearance look aged.
You’ll notice that I didn’t use music paper background on these. That’s because I took these illustrations from a large Golden book and they therefore filled the entire 2″ x 7″ bookmark.
Illustrations from regular Little Golden Books are often too small and need the background.
Update (2025)
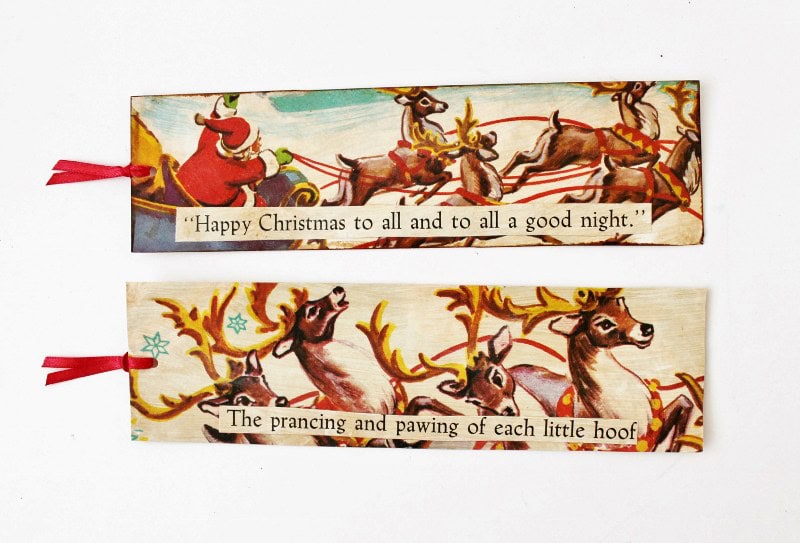
Here are two more featuring primarily flying reindeer.
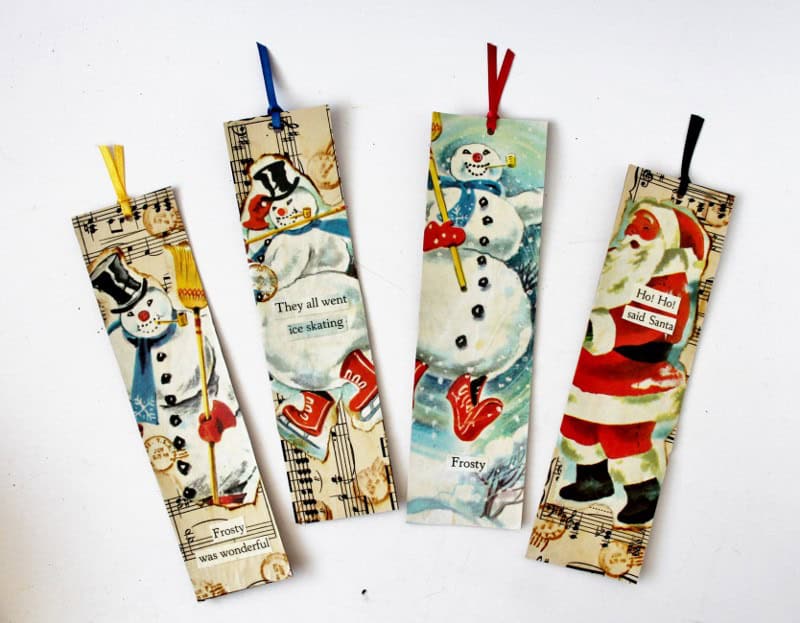
The snowmen come from the Little Golden Book (LGB), Frosty the Snowman, illustrated by the well known LGB artist, Corinne Malvern. The Santa image is from Rudolph the Red-Nosed Reindeer.
How to Use Your Bookmarks

- Gift tags
- Sell them (I sell them for $4 each)
- Stocking stuffer
- Tucked inside a book you give as a gift
Other Articles You May Enjoy


Final Thoughts
I’d love to hear if you plan to make some of these bookmarks 🙂 Will you keep, gift, or sell them? If you’re a vintage or craft show seller, I highly recommend you consider adding these to your inventory.
They are fun [almost addictive!] to make and sell for $4 each, though I’m considering increasing the price to $5 next year.
I like to make them in batches as that makes the process go much faster. After you’ve made a batch or two, you’ll be surprised at how fast things go.
Thanks for stopping by–
If you enjoyed this post, subscribe today
and get a FREE copy of my eBook:

I’d love it if you’d pin me ⮛ to your fave Pinterest board–thanks!

I can never find you on Etsy??? Can you put that information on your next article please!!!!
I hope you are feeling 100% now! You are so creative and I appreciate how generous you are with sharing your talents with everyone. I think these bookmarks are awesome!! I’m going to give it a try as I already have all the supplies! Thanks, julie
Doing better, thank you Julie 🙂 Thank you for your very kind thoughts–they mean so much! I’d love to see your bookmarks when they’re finished–
These are adorable! I have a few old Christmas books that are in terrible shape so would be good for this project. I’ve had so much fun making, and selling, your vintage sewing pattern bookmarks. I will give these a try, thank you!