Vintage Red Level Christmas Decor
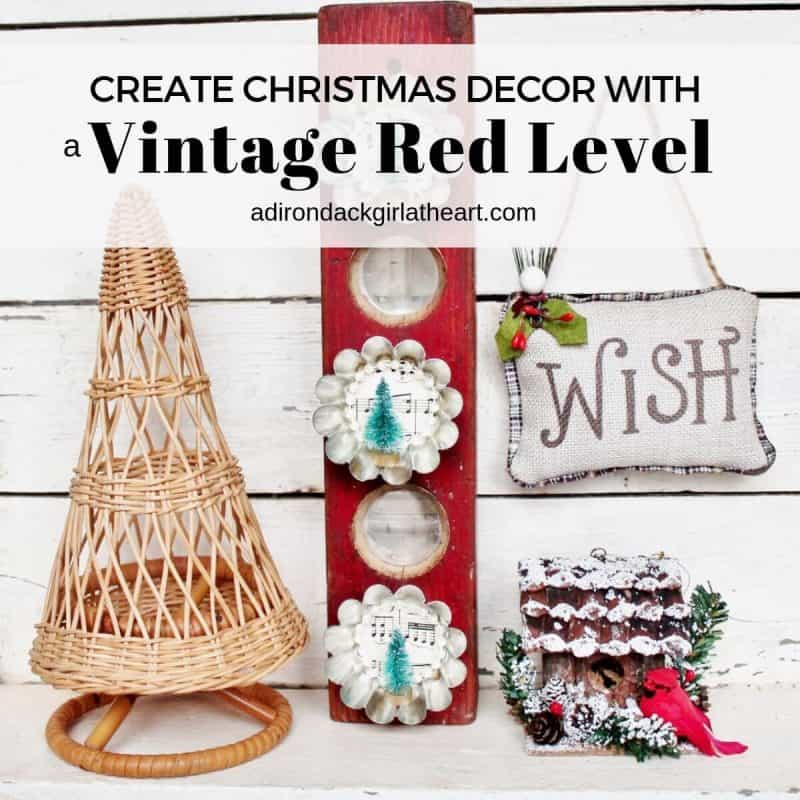
Hi there–I’m so glad you stopped by! Today is the final day in my 12 Days of Christmas event, where I’ll be showing you how to create vintage red level Christmas decor.
It’s also time for December’s Thrifty Chick project, which means you’ll have access to five other creative posts from my Thrifty Chick girlfriends (links at the end of this post).
You can find all twelve posts in one place, right here. And here’s another level-related post where I made a unique hanging rack.

Note: This post contains affiliate links for [the same or similar] products used to complete this project. This is both for your convenience as well as to support my website, since I receive a small compensation whenever you click on a link and make any sort of purchase, for which I thank you 🙂 See my full disclosure here.
Materials for Vintage Red Level Christmas Decor
 When I stumbled upon this bright cherry red level at a garage sale earlier in the year, she spoke to me of Christmas.
After handing over a dollar, I brought her home with me, cleaned her up, and set her on my “Christmas crafting” workbench.
There she sat until inspiration hit. On the same bench I have multiple piles of vintage tart tins in various sizes. I guess the two “married” in my mind and that’s how this craft was born.

Materials:
- Vintage wooden level
- Vintage music paper (or vintage style music paper)
- Tart tins
- Mini 1 1/2″ bottle brush trees
- Ivory pearl garland
- D-ring or sawtooth hanger
- Small nails
- Hammer
- Modge Podge
- Hot glue
- Tacky glue
How to Create Vintage Level Christmas Decor
 Step 1: Nail the tart tins to your level. You might want to make some “pilot” holes in the tins with hammer and nail, then nail them securely to the level.
The pilot holes prevented the tart tins from moving around while hammering them into place
 Step 2: Cut a circle of music paper to fit the bottom of the tart tin.
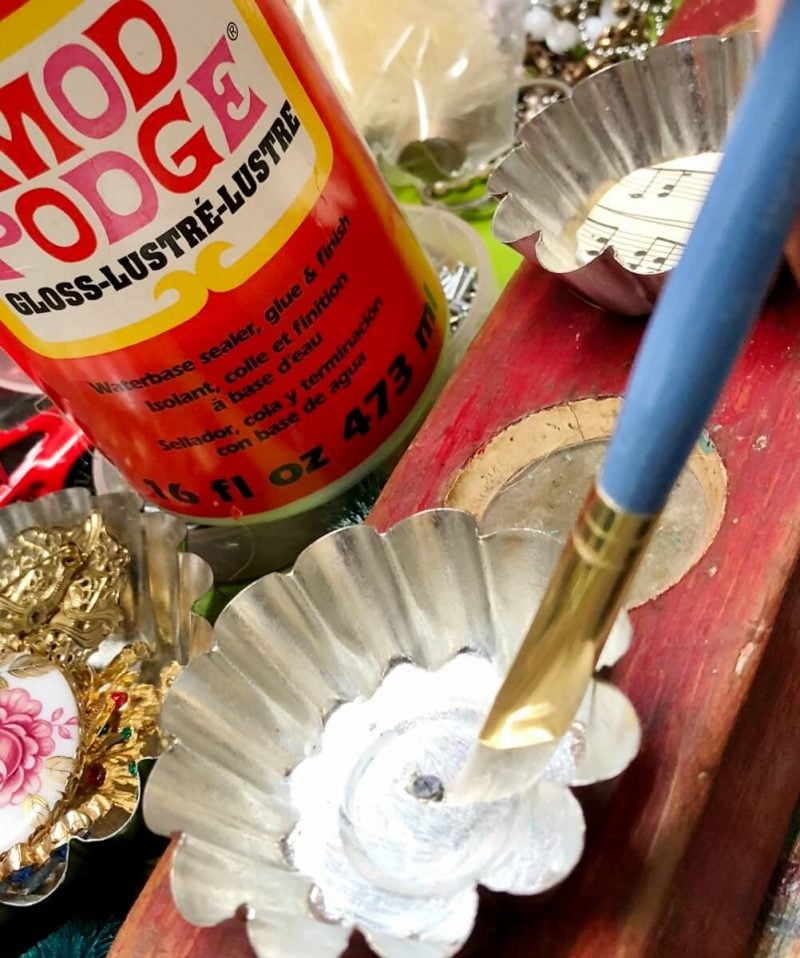
Step 3: Apply Mod Podge to the bottom of each tart tin and insert a music paper circle.
NOTE: I have a 2″ round paper punch that created perfectly-sized circles, but you can make them by using a glass of the correct size.
 Step 4: Secure the pearl garland around the outer edge of the music paper using tacky glue and let it dry over night.
Step 5: After the glue has dried, adhere the bottle brush trees into position with hot glue.
NOTE: Because the tart tin’s fluted sides make it difficult to attach things to, I placed glue on the bottom and the back of the tree, so it’s primarily glued to the layer of pearls.
 Step 6: Secure a D-ring to the back of the level for hanging, and you’re done.
 I know it’s a bit quirky, creating a Christmas decoration out of an old level, but all the elements combine perfectly [in my mind, anyway] to create a romantic piece that would mix well with a variety of different styles of decorating.
I hope you enjoyed today’s vintage-y project along with the eleven that proceeded it. Thank you to so many who have followed along with my 12 Days of Christmas every step of the way!
Before you head off to do who-knows-what, please pop in and visit my fellow Thrifty Chicks and enjoy their unique brand of Christmas decorations:

Thanks for stopping by–
If you enjoyed this post, subscribe today
and get a FREE copy of my eBook:


This is so cute, Diana! Love the red and that it’s short. Adorable with the tart tins and mini trees:) Congrats on getting through your 12 days; what an accomplishment! Now rest awhile!
I just love old tools ! What a great bonus to find something red!! SO cute!!
This is just too cute! Love the idea. Thanks so much for sharing. Now I’ll be on the lookout for levels to make me one.
Hi Diana! You have so many cute ideas. You know I am loving the sheet music tart tins with the tiny bottle brush trees!
Merry Christmas!
How adorable . I like the little trees in the tins. It makes a sweet ornament to brighten up a little spot in the house.
Very cute Diana…and wishing you a very Merry Christmas! Sandi